
Guide: Customizing Your Windows 11 Alert Sounds

Guide: Customizing Your Windows 11 Alert Sounds
Quick Links
- Change the Notification Sound Using Control Panel
- Change the Notification Sound Using the Registry Editor
- How to Set a Custom Notification Sound
Key Takeaways
- To change the notification sound on Windows 11, open Control Panel and navigate to Hardware and Sound > Sound. Then, click the “Sounds” tab and click “Notification” in the Program Events section. Choose a notification sound of your choice from the “Sounds” drop-down menu and click “Apply” and “OK” to save the changes.
Notifications can help you stay up-to-date on what’s happening on your computer. If you’re bored of the default notification sound on Windows 11, and want something different, you can easily change the notification sound to something more attention-grabbing.
Change the Notification Sound Using Control Panel
Control Panel is where you go to manage necessary Windows settings. You can use it to change your computer’s appearance, manage hardware devices, uninstall programs , and more, including changing the notification sound on your Windows 11 PC.
To change the notification sound using the Control Panel, open the Start menu, type “Control Panel” in the search bar, and press Enter. In the Control Panel, click “Hardware and Sound” and then “Sound.”
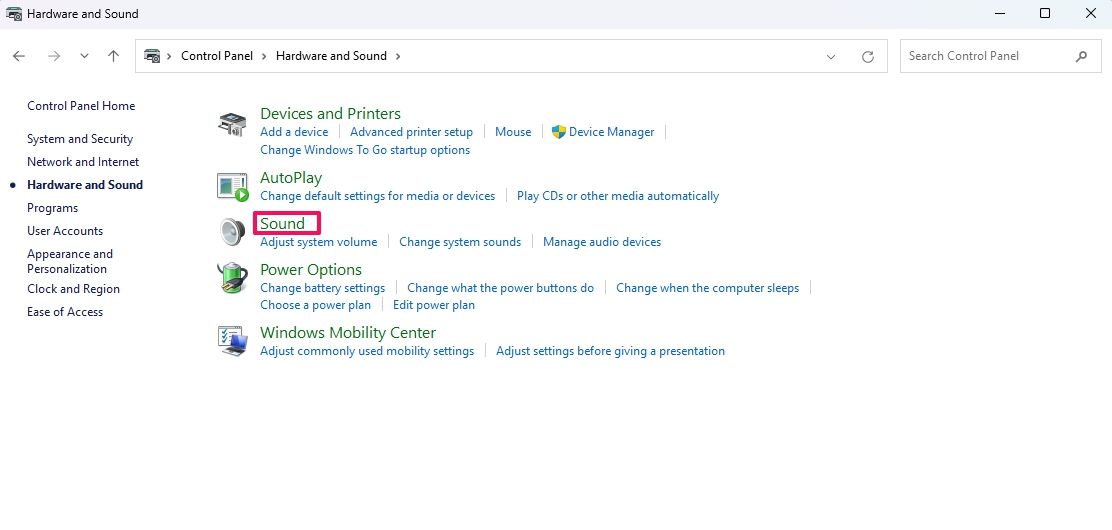
In the Sound window, switch to the “Sounds” tab and click “Notification” in the Program Events section.
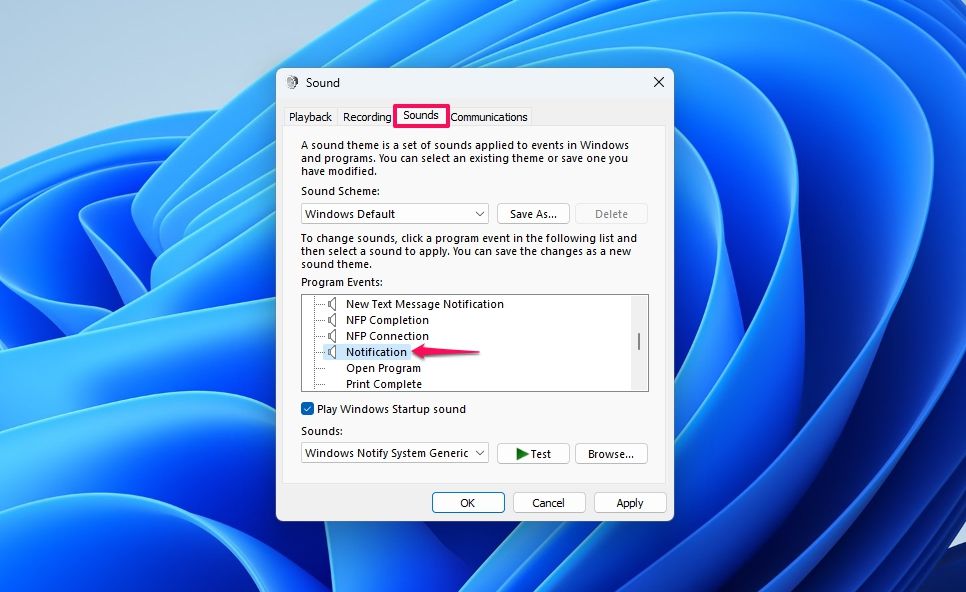
Then, click the drop-down icon under the “Sounds” option and choose a sound effect of your choice. You can select a sound and then click “Test” to hear it.
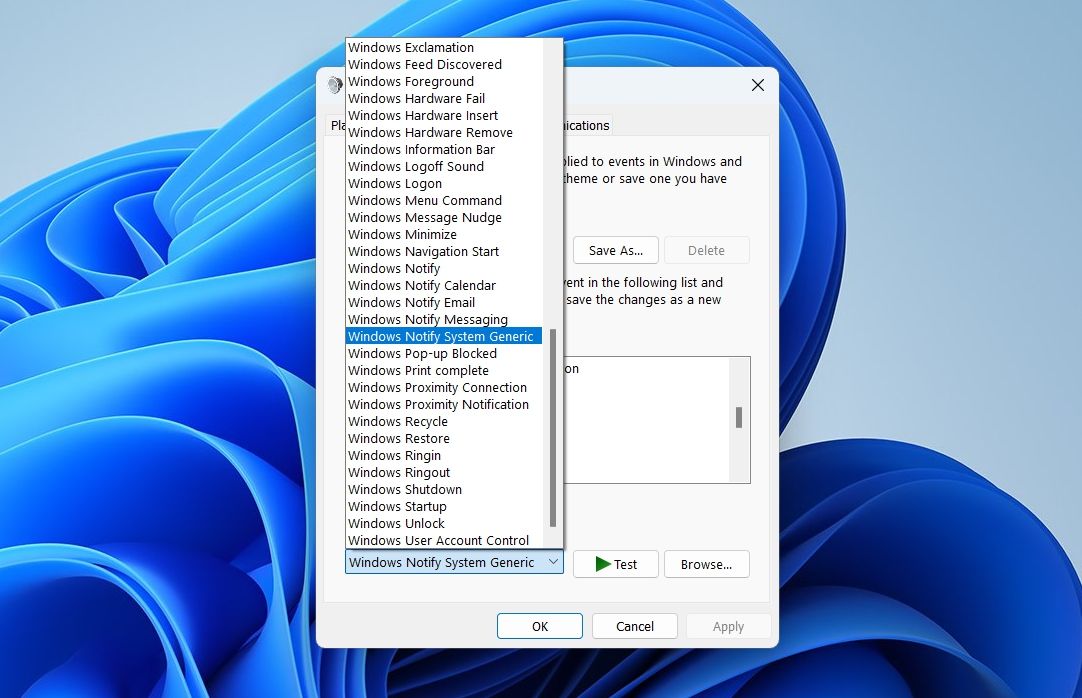
Once you have finalized a sound for your notifications, click “Apply” and “OK” to save the changes. Now, you will hear the sound you selected whenever you receive a notification.
Change the Notification Sound Using the Registry Editor
If you aren’t an advanced Windows user, you should prefer the Control Panel method to change the notification sound on your computer. However, if you’re an experienced Windows user who is comfortable with the Windows Registry, you can also use the Registry Editor to modify the notification sound. While the Registry Editor method is slightly more involved, it serves as an alternative solution if the Control Panel is inaccessible for any reason.
Be aware, however, that editing the registry incorrectly can cause serious problems, such as device driver problems, network problems , Blue Screen of Death (BSOD) errors , and data loss. In the worst case, your computer may fail to boot at all .
Be sure then to back up the registry first and create a restore point . This way, you can restore your computer to a working state if something goes wrong.
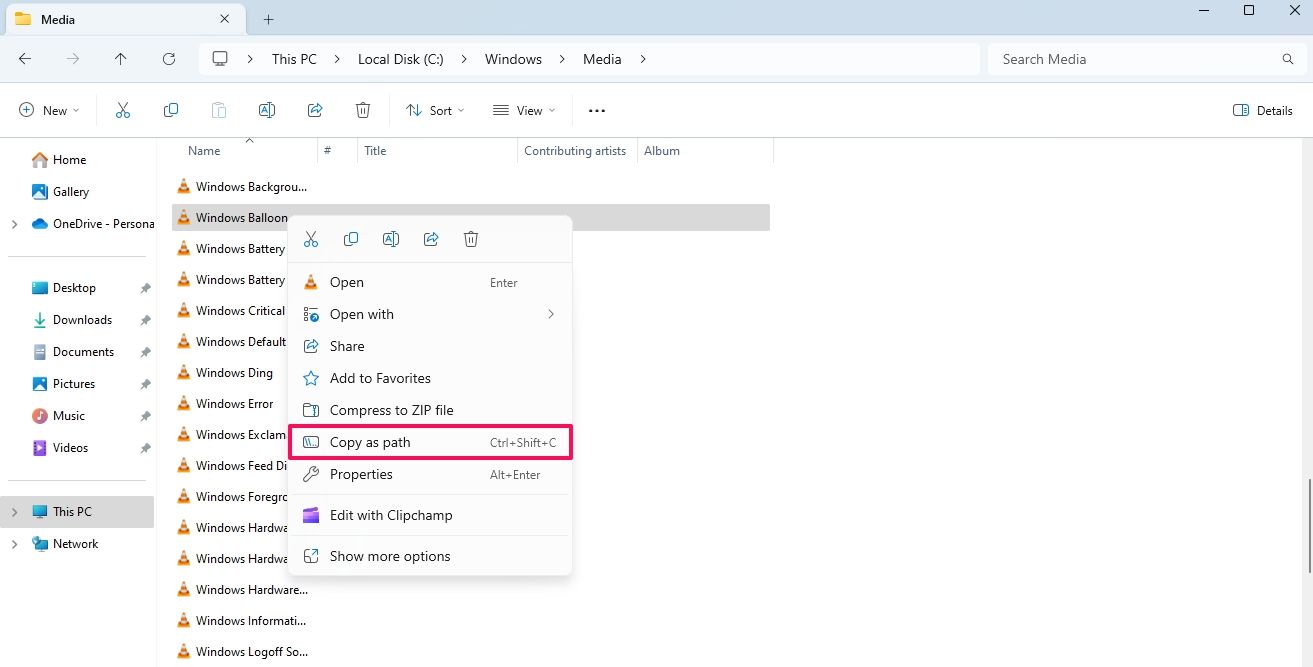
Once you have completed these prerequisites, press Windows+E to open “File Explorer” and navigate to the following location:
`C:\Windows\Media`
Right-click the sound you want to set as your notification sound and click “Copy as path.”
Now, open the Start menu, type “Registry Editor” in the search bar, and press Enter. In the Registry Editor, navigate to the following location:
`Computer\HKEY_CURRENT_USER\AppEvents\Schemes\Apps\.Default\Notification.Default\.Current`
Double-click the “Default” string value in the right pane and paste the copied path into the “Value data” field. Make sure to remove the double quotes. Then, click “OK.”
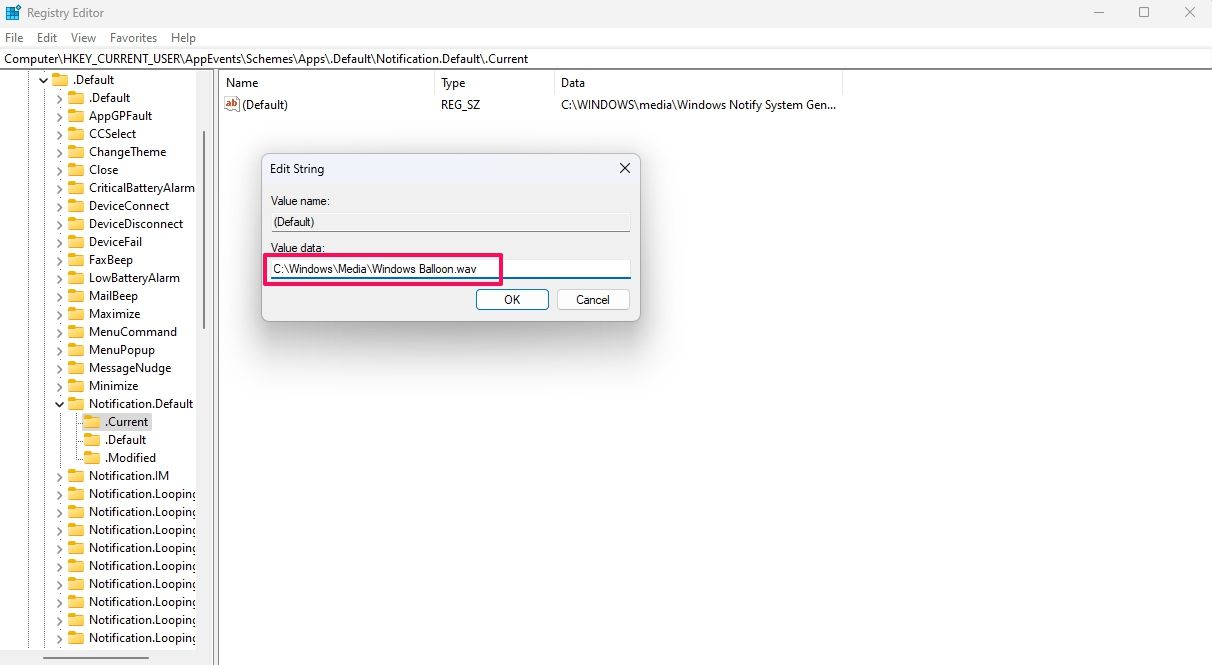
After that, restart your computer for the changes to take effect.
How to Set a Custom Notification Sound
Although Windows offers a long list of sound effects that you can set as your default notification sound, you can also set a custom sound. From the Super Mario theme song to the classic Nokia ringtone, you can set any sound effect as your default notification sound, as long as it is in the WAV format .
To begin, download the sound effects to your computer. You can use websites like FindSounds and Freesound to download your favorite sound effects for free.
Once you have downloaded the sound effect and made sure that it is in the WAV format, open the “Control Panel” and navigate to Hardware and Sound > Sound.

In the Sound window, switch to the “Sounds” tab and select “Windows Default (modified)” from the “Sound Scheme” drop-down menu.
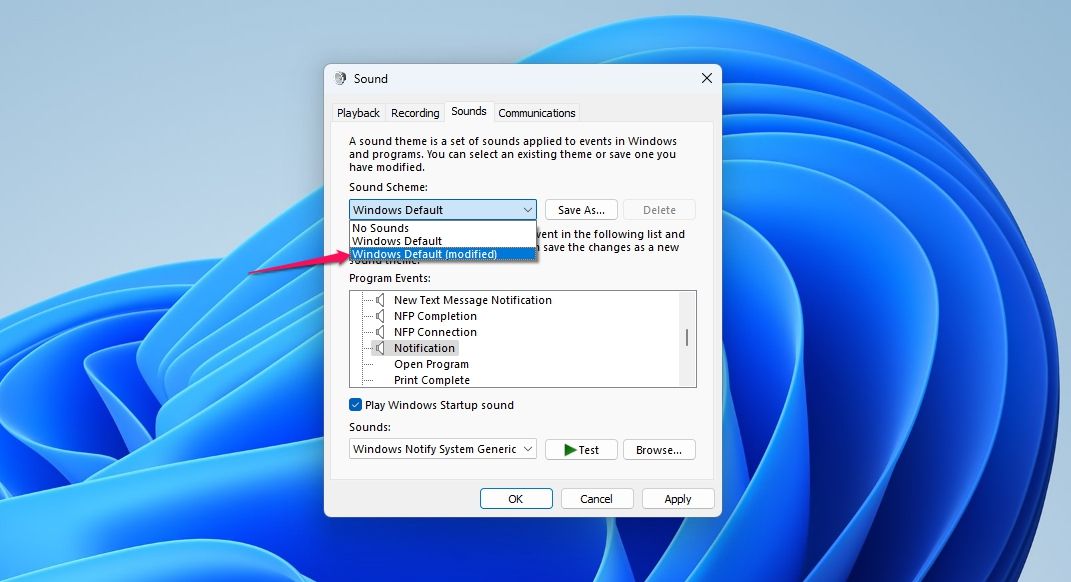
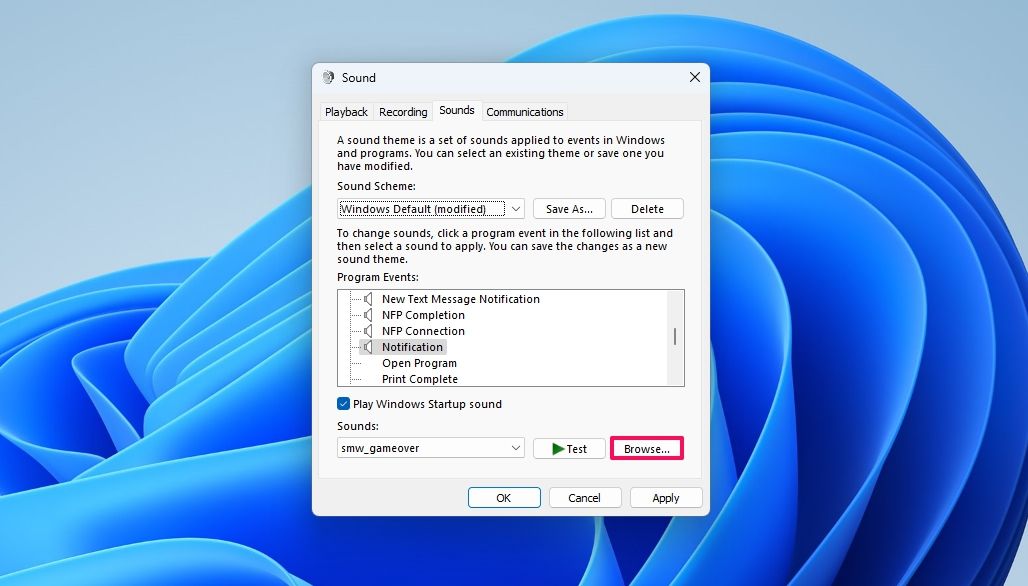
Then, select “Notifications” in the Program Events section and click “Browse.”
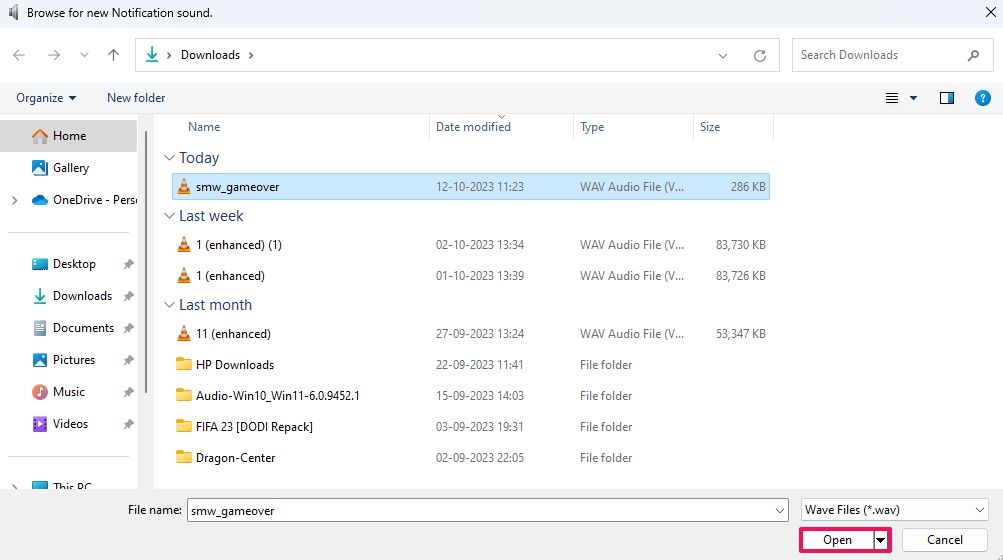
Select the downloaded sound effect and click “Open.” Then, click “Apply” and “OK” to save the changes.
That’s how to change the notification sound to something different if you’re tired of the same old sound. Now go forth and edit your Windows notification sound to your heart’s content!
Also read:
- [New] Crafting a Music Career 15 Essential Video Tutorials for Artists for 2024
- [Updated] Daily Movie Storage GB Explained for 2024
- [Updated] Enhance Productions No-Cost Sounds Available for 2024
- 1K Fans on YT Your Strategic Playbook for Success for 2024
- Evaluating AI's Potential to Strengthen or Compromise Mental Health Interventions: An Insightful Look
- How To Remove Screen Lock PIN On Oppo Reno 11 Pro 5G Like A Pro 5 Easy Ways
- In 2024, YouTube's Creative Playground Explained with Ease
- Innocuous Names, Hidden Dangers: A Guide to Authentic ChatBots
- Instant Access: ASUS Monitor Driver Installation Guide
- New 2024 Approved Slideshow Magic on Mac Easy Video Editing with Ezvid
- The Ultimate Guide to Making Money on YouTube Average Required Views for 2024
- Title: Guide: Customizing Your Windows 11 Alert Sounds
- Author: Jeffrey
- Created at : 2024-11-25 18:26:41
- Updated at : 2024-11-28 17:26:34
- Link: https://eaxpv-info.techidaily.com/guide-customizing-your-windows-11-alert-sounds/
- License: This work is licensed under CC BY-NC-SA 4.0.