![[New] 2024 Approved Film Assembly Station](https://thmb.techidaily.com/af6a241ce73781e980e91fb32b5f340b0c43ca449b76945212041b79725c225d.jpg)
"[New] 2024 Approved Film Assembly Station"
Film Assembly Station
In today’s world where businesses are going digital, it is very important to think of how you are going to get your products in front of many customers as possible without having to spend a fortune. That’s where YouTube Clip Maker comes in. It is an effective way for making YouTube videos that you can use for your business advertisements.
If you are a budding YouTuber or just looking at starting to make YouTube videos, you should consider among your editing tools a YouTube Clip Maker. It is an application that has all the tools necessary for you to edit videos in a fast and convenient way and enables you to upload the completed videos to YouTube. It is a simple tool with a friendly-to-use interface for editing videos, it should be a must-have for all users.
Part 1. Best YouTube Clip Maker Filmora
Filmora is a feature-rich audio and video editor that helps beginners with the editing of their audio and video files. The designers did their job with the armature editors in mind. It gives them a simple and easy-to-use layout that makes the work less complicated. Filmora has a built-in feature that lets you record your music and voice and also trim, merge, and cut a split your mp3 files.
Besides all the wonderful features, Filmora lets you make adjustments to speed, pitch, and volume, this makes you improve the clarity of your audio file. The app can be used to customize ringtones and specialized sound effects for your presentation.


For Win 7 or later (64-bit)
For macOS 10.12 or later
Steps on How to Use Filmora
This is an app that is best suited to those starting in video editing and requires the use of an easy-to-use app that can as well deliver quality work. Filmora is an application that was made with the armature editors in mind and is one they should consider while looking for a program to work with. It features some of the essential tools one would require and it is easy to learn how to navigate through it.
Installation Steps
- Click the icon in the center of the Media Library to add files directly.
- Go File > Import Media > Import Media Files.
- Drag and drop to the ‘media library’ directly.
When importing a media file and Filmora asks you to create a proxy file to speed up the editing process. Select “Yes” to have a fast video editing experience.
You can also import video clips using your Touch Bar controls if your computer has Touch Bar.
Record a media file
Apart from the videos shot by your digital devices, you can also directly import media files by recording video from your webcam, screen recording your computer, and a voice-over recording.
Computer screen recording:
Click the “Record” option, and choose “Record PC Screen” to get the built-in Wondershare Screen Recorder. Hit the red button to get started. To finish recording click on F9
Record videos from webcam:
Also, click the “Record” option, and choose “Record from Webcam”. In the recording pop-up window, select the red button, it will start the recording process and is also the button to choose when you want to stop recording. You will then select OK to save the recorded video clip.
Record voice-over:
Choose “Record a voiceover” on the Record menu. It would be better to connect a microphone to your Mac for a better result. Hit the Record button, and it leaves you 3 seconds to get ready.
All media files recorded are automatically saved in the “Media Library”, in case of further editing, you can drag them to the timeline.
Part 2. How to Make YouTube Clip Online
The application lets you trim your YouTube videos without having to have an account. It provides you with a quick way to either cut the beginning or end of a YouTube video. YouTube Trimmer will let you trim the video in a couple of seconds with just a few clicks. To use the app, you just need to copy and paste the earl and you are on your way to editing. You don’t have to be worried about downloading or installing the application for you to use it.
Steps on How to Use YouTube Trimmer
Step 1:
Import
Copy the YouTube link that you want to work on and paste it into the field indicated on the application.
Step 2:
Trim and Edit
You can drag the video at the edges to trim it. You can also move the playhead with your mouse and manually make cuts by clicking on the cut button.
Step 3:
Export
Once you are done editing and happy with the outcome, select the Export button to start rendering the video. Here you can choose to publish it on YouTube or save it for other uses.
Part 3. YouTube Clip Maker for Android and iPhone
KineMaster
It is a simple-to-use application that lets you create professional-quality videos in very short minutes. It enables you to edit pre-made videos or lets you make fresh ones by combining your video with several visual and sound effects. After you are done with the editing, you can save your video or share it out there.
Steps on How to Use Kinemater
Step 1:Create
It lets you import videos, audio, and images from your device. After which you can cut, rearrange, and transition between your images and videos using the KineMaster’s video layering support. This is highly dependent on your computer’s hardware capabilities.
Step 2:Edit
Adjust your video’s appearance parameters by blending color modes, adding light and sound effects, overlaying graphics, and text, or rather directly drawing on the video by using the handwriting layers.
Step 3:Share
You can export your project up to 4k and 60fps. The app saves directly to your camera’s roll besides letting you share to social media.

Part 4: Related FAQs
**How to Make a Clip from a YouTube Video ?
First, sign in to YouTube and start playing a video. Under the video click on the Clip, this will create a clip box after which you will select the part of the video that you want to clip. Give the clip a title then click share after which you will be prompted to choose an option for sharing.
**How to Clip Parts of a YouTube Video ?
Start by sign-in and opening YouTube then proceed by watching a video. If clips are available, you will see a clips icon in the bar at the bottom of the video. Click on the clip icon and select that part of the video you are interested in, give the clip a title, and select Share Clip. Choose whether you want to share the clip or save it for later use.
**What YouTubers Use to Get Clips ?
YouTubers use several video editors for their work. Some of the most popular editors are iMovie, Final Cut Pro X, and Premier Pro CC. These YouTube editing apps vary in technicalities of use and features whereby you will find that some are easy to use and have varying features. Some of the editors are free while others require payments for one to use.
For macOS 10.12 or later
Steps on How to Use Filmora
This is an app that is best suited to those starting in video editing and requires the use of an easy-to-use app that can as well deliver quality work. Filmora is an application that was made with the armature editors in mind and is one they should consider while looking for a program to work with. It features some of the essential tools one would require and it is easy to learn how to navigate through it.
Installation Steps
- Click the icon in the center of the Media Library to add files directly.
- Go File > Import Media > Import Media Files.
- Drag and drop to the ‘media library’ directly.
When importing a media file and Filmora asks you to create a proxy file to speed up the editing process. Select “Yes” to have a fast video editing experience.
You can also import video clips using your Touch Bar controls if your computer has Touch Bar.
Record a media file
Apart from the videos shot by your digital devices, you can also directly import media files by recording video from your webcam, screen recording your computer, and a voice-over recording.
Computer screen recording:
Click the “Record” option, and choose “Record PC Screen” to get the built-in Wondershare Screen Recorder. Hit the red button to get started. To finish recording click on F9
Record videos from webcam:
Also, click the “Record” option, and choose “Record from Webcam”. In the recording pop-up window, select the red button, it will start the recording process and is also the button to choose when you want to stop recording. You will then select OK to save the recorded video clip.
Record voice-over:
Choose “Record a voiceover” on the Record menu. It would be better to connect a microphone to your Mac for a better result. Hit the Record button, and it leaves you 3 seconds to get ready.
All media files recorded are automatically saved in the “Media Library”, in case of further editing, you can drag them to the timeline.
Part 2. How to Make YouTube Clip Online
The application lets you trim your YouTube videos without having to have an account. It provides you with a quick way to either cut the beginning or end of a YouTube video. YouTube Trimmer will let you trim the video in a couple of seconds with just a few clicks. To use the app, you just need to copy and paste the earl and you are on your way to editing. You don’t have to be worried about downloading or installing the application for you to use it.
Steps on How to Use YouTube Trimmer
Step 1:
Import
Copy the YouTube link that you want to work on and paste it into the field indicated on the application.
Step 2:
Trim and Edit
You can drag the video at the edges to trim it. You can also move the playhead with your mouse and manually make cuts by clicking on the cut button.
Step 3:
Export
Once you are done editing and happy with the outcome, select the Export button to start rendering the video. Here you can choose to publish it on YouTube or save it for other uses.

Part 3. YouTube Clip Maker for Android and iPhone
KineMaster
It is a simple-to-use application that lets you create professional-quality videos in very short minutes. It enables you to edit pre-made videos or lets you make fresh ones by combining your video with several visual and sound effects. After you are done with the editing, you can save your video or share it out there.
Steps on How to Use Kinemater
Step 1:Create
It lets you import videos, audio, and images from your device. After which you can cut, rearrange, and transition between your images and videos using the KineMaster’s video layering support. This is highly dependent on your computer’s hardware capabilities.
Step 2:Edit
Adjust your video’s appearance parameters by blending color modes, adding light and sound effects, overlaying graphics, and text, or rather directly drawing on the video by using the handwriting layers.
Step 3:Share
You can export your project up to 4k and 60fps. The app saves directly to your camera’s roll besides letting you share to social media.
Part 4: Related FAQs
**How to Make a Clip from a YouTube Video ?
First, sign in to YouTube and start playing a video. Under the video click on the Clip, this will create a clip box after which you will select the part of the video that you want to clip. Give the clip a title then click share after which you will be prompted to choose an option for sharing.
**How to Clip Parts of a YouTube Video ?
Start by sign-in and opening YouTube then proceed by watching a video. If clips are available, you will see a clips icon in the bar at the bottom of the video. Click on the clip icon and select that part of the video you are interested in, give the clip a title, and select Share Clip. Choose whether you want to share the clip or save it for later use.
**What YouTubers Use to Get Clips ?
YouTubers use several video editors for their work. Some of the most popular editors are iMovie, Final Cut Pro X, and Premier Pro CC. These YouTube editing apps vary in technicalities of use and features whereby you will find that some are easy to use and have varying features. Some of the editors are free while others require payments for one to use.
For macOS 10.12 or later
Steps on How to Use Filmora
This is an app that is best suited to those starting in video editing and requires the use of an easy-to-use app that can as well deliver quality work. Filmora is an application that was made with the armature editors in mind and is one they should consider while looking for a program to work with. It features some of the essential tools one would require and it is easy to learn how to navigate through it.
Installation Steps
- Click the icon in the center of the Media Library to add files directly.
- Go File > Import Media > Import Media Files.
- Drag and drop to the ‘media library’ directly.
When importing a media file and Filmora asks you to create a proxy file to speed up the editing process. Select “Yes” to have a fast video editing experience.
You can also import video clips using your Touch Bar controls if your computer has Touch Bar.
Record a media file
Apart from the videos shot by your digital devices, you can also directly import media files by recording video from your webcam, screen recording your computer, and a voice-over recording.
Computer screen recording:
Click the “Record” option, and choose “Record PC Screen” to get the built-in Wondershare Screen Recorder. Hit the red button to get started. To finish recording click on F9
Record videos from webcam:
Also, click the “Record” option, and choose “Record from Webcam”. In the recording pop-up window, select the red button, it will start the recording process and is also the button to choose when you want to stop recording. You will then select OK to save the recorded video clip.
Record voice-over:
Choose “Record a voiceover” on the Record menu. It would be better to connect a microphone to your Mac for a better result. Hit the Record button, and it leaves you 3 seconds to get ready.
All media files recorded are automatically saved in the “Media Library”, in case of further editing, you can drag them to the timeline.
Part 2. How to Make YouTube Clip Online
The application lets you trim your YouTube videos without having to have an account. It provides you with a quick way to either cut the beginning or end of a YouTube video. YouTube Trimmer will let you trim the video in a couple of seconds with just a few clicks. To use the app, you just need to copy and paste the earl and you are on your way to editing. You don’t have to be worried about downloading or installing the application for you to use it.
Steps on How to Use YouTube Trimmer
Step 1:
Import
Copy the YouTube link that you want to work on and paste it into the field indicated on the application.
Step 2:
Trim and Edit
You can drag the video at the edges to trim it. You can also move the playhead with your mouse and manually make cuts by clicking on the cut button.
Step 3:
Export
Once you are done editing and happy with the outcome, select the Export button to start rendering the video. Here you can choose to publish it on YouTube or save it for other uses.
Part 3. YouTube Clip Maker for Android and iPhone
KineMaster
It is a simple-to-use application that lets you create professional-quality videos in very short minutes. It enables you to edit pre-made videos or lets you make fresh ones by combining your video with several visual and sound effects. After you are done with the editing, you can save your video or share it out there.
Steps on How to Use Kinemater
Step 1:Create
It lets you import videos, audio, and images from your device. After which you can cut, rearrange, and transition between your images and videos using the KineMaster’s video layering support. This is highly dependent on your computer’s hardware capabilities.
Step 2:Edit
Adjust your video’s appearance parameters by blending color modes, adding light and sound effects, overlaying graphics, and text, or rather directly drawing on the video by using the handwriting layers.
Step 3:Share
You can export your project up to 4k and 60fps. The app saves directly to your camera’s roll besides letting you share to social media.
Part 4: Related FAQs
**How to Make a Clip from a YouTube Video ?
First, sign in to YouTube and start playing a video. Under the video click on the Clip, this will create a clip box after which you will select the part of the video that you want to clip. Give the clip a title then click share after which you will be prompted to choose an option for sharing.
**How to Clip Parts of a YouTube Video ?
Start by sign-in and opening YouTube then proceed by watching a video. If clips are available, you will see a clips icon in the bar at the bottom of the video. Click on the clip icon and select that part of the video you are interested in, give the clip a title, and select Share Clip. Choose whether you want to share the clip or save it for later use.
**What YouTubers Use to Get Clips ?
YouTubers use several video editors for their work. Some of the most popular editors are iMovie, Final Cut Pro X, and Premier Pro CC. These YouTube editing apps vary in technicalities of use and features whereby you will find that some are easy to use and have varying features. Some of the editors are free while others require payments for one to use.
Boost Your Channels: A Guide to Best YouTube SEO Resources
10 Best YouTube Keyword Tools to Get More Views

Richard Bennett
Mar 27, 2024• Proven solutions
If we asked you to name the world’s biggest search engines, undoubtedly you’d come up with Google, but what would be number two? Bing? Yahoo? The truth might surprise you.
According to figures, the world’s second biggest search engine is actually YouTube. Millions of people are using it everyday to search for videos about fitness, hair, marketing and more. With such a large audience already searching directly on the platform, doesn’t it make sense that when we use YouTube keyword research and SEO should be as important as it is on our website?
Luckily, we can use YouTube keyword tools to analyze YouTube keywords. Here we’re going to take a look at 10 best YouTube keyword tools out there, which can help you identify and optimize for the highest traffic keywords for your videos. By optimizing your videos, you can rank higher, get more views and enjoy a larger audience on YouTube.
- Part 1: 10 Best YouTube Keyword Tools Recommendation
- Part 2: Bonues Tips - Google video result keywords
You May Also Like:
YouTube SEO Complete Guide >>
How to Edit and Optimize YouTube Title, Description, and Tags >>
Do you want to edit YouTube video easily? Filmora is a YouTube editor that you should have a try. As a YouTube video editing tool, it is simple to use with dragging and dropping. You can add various video effects, filters and transition to make your video better. Besides, titles and texts are also available to use. After editing, you can directly upload video to YouTube plactform. Now, download it to have a try!
 Download Mac Version ](https://tools.techidaily.com/wondershare/filmora/download/ )
Part 1: 10 Best YouTube Keyword Tools Recommendation
Before you can get into using any YouTube SEO tool, you’ll need to identify what the best keywords for your videos are. Let’s start by taking a look at the best YouTube keyword tools available.
1. YouTube autocomplete
When you start to search for something on YouTube, you’ll probably notice that YouTube suggests some keywords to finish your search. This is called autocomplete, and it works by suggesting the most popular keywords that start with the letters you’ve typed so far. What it is essentially saying is that those are the most frequently searched for terms that use the words you’ve already typed.
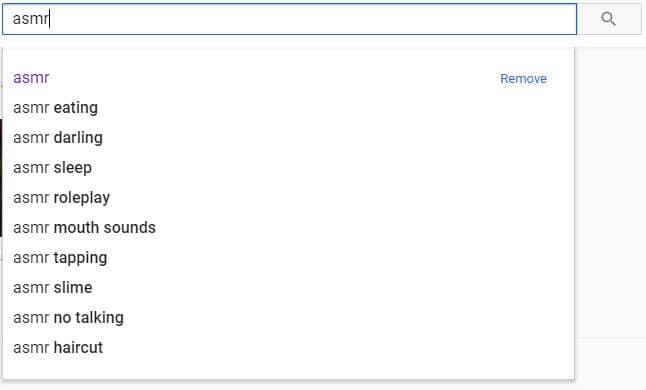
This means it’s a great place to start building your keywords, and a fantastic YouTube keyword tool for your videos. Just start your search for your video (e.g. shoes for…) and see what comes up. In this case, we can see that the most popular keywords are ‘girls’, ‘men’, ‘kids’, ‘summer’ and ‘boys’.
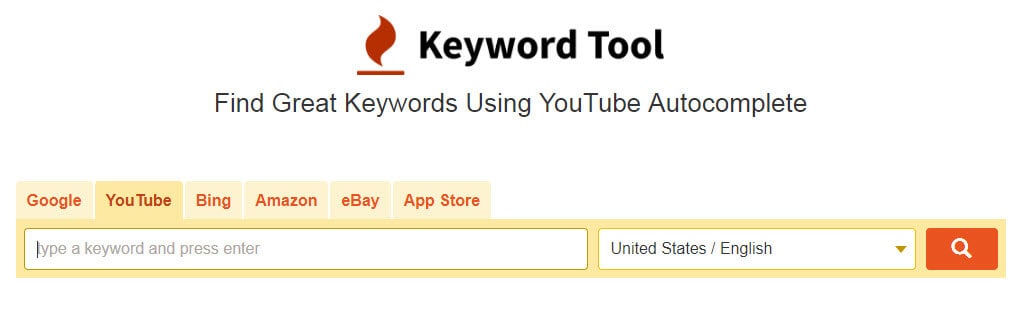
2. Keywordtool.io
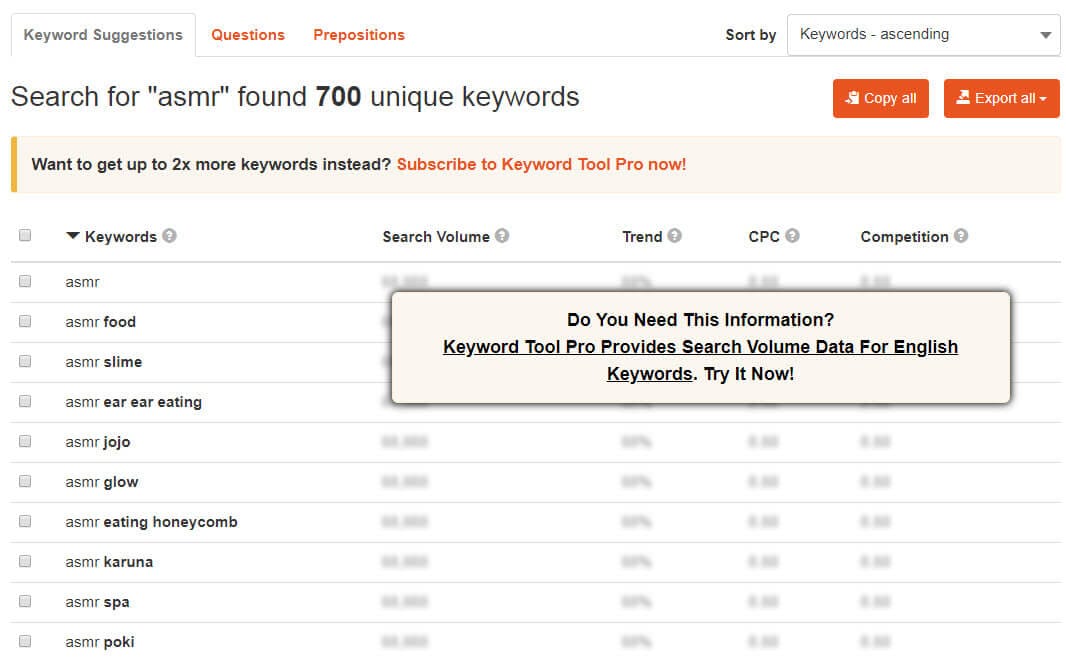
Without doubt, this is one of the most powerful YouTube keyword tools out there, ranking hundreds of keywords by popularity. It captures data from YouTube autocomplete and allows you to create lists of keywords from that data. As well as autocompete data, you can also search for questions people are asking, which makes it highly beneficial as a YouTube SEO tool.
The downside to this particular tool is that it’s fairly limited on the free version. Upgrading to Pro Basic will give you almost double the keyword results and will let you compare the volume of searches made for those terms too. However, this will set you back around $68 a year, so it’s going to be something of an investment if you go for it.
3. SEOChat
SEO Chat is an amazing free tool that can generate keyword ideas from Google, Amazon, Bing and YouTube. You can search for keywords from all of those sources or can just search YouTube alone to find your keyword lists. You’ll need a ‘seed’ keyword, such as ‘shoes’, ‘make up’ or ‘marketing’, and then organizes results alphabetically with other letters following your seed keyword.

Simply scrolling through the results is going to give you loads of ideas for keywords and possibly content too. The tool also allows you to further expand your results by selecting a keyword and running ‘part two’ of the process, which expands those phrases even further. Your chosen keywords can be exported from the software, ready for use in your YouTube SEO tool.
4. Gather keywords from your competitor
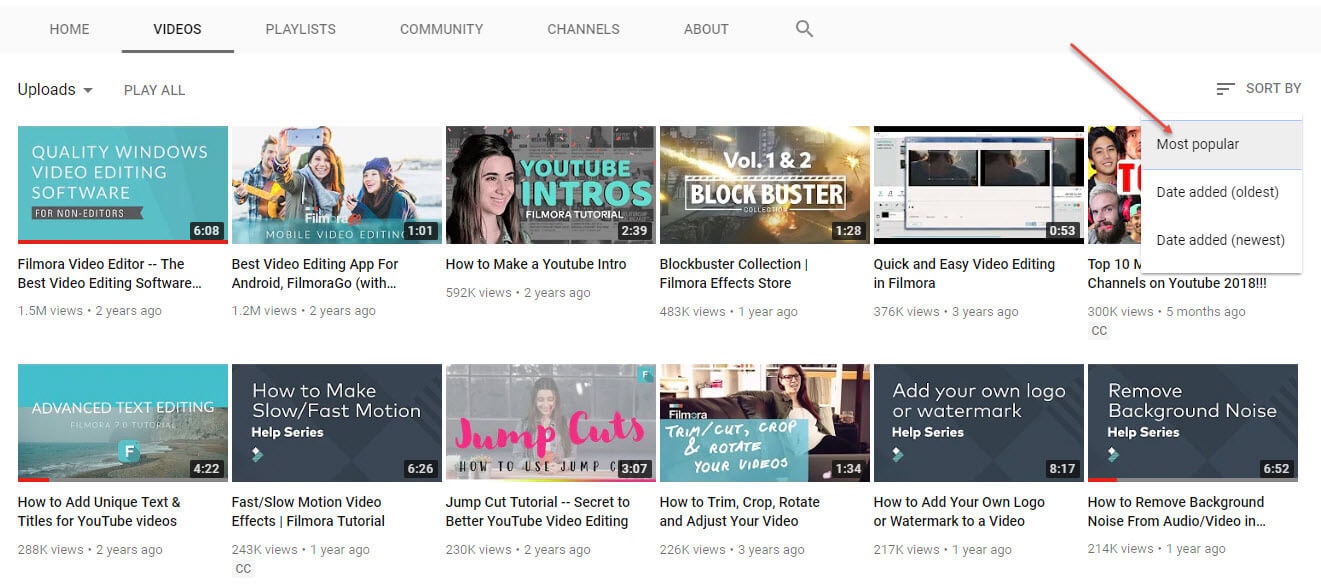
Why not learn from the best and see what’s already working for your competitors? Finding their high traffic keywords is easy and can save a lot of time and energy. To do this, pick a channel that is around your size, as they’re your nearest competitors. Steer clear of the huge channels, as you’ll find it hard to rank next to them.
Click the videos tab to see their content, and sort them by ‘most popular’ to see the ones which got the most views. Take a look at the title and the description of those videos, and you’ll find a good fistful of proven keywords that you can start using yourself.
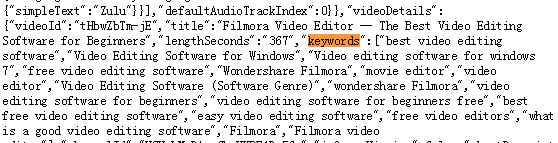
That’s not all though. To maximize your competitor research, let’s dig a little deeper into the tags they have used for their videos too. Unfortunately, these are hidden on YouTube, but are easily seen using the page’s HTML. Simply right click on the page and select ‘view source’. Don’t be alarmed at the great stream of HTML that pops up, it’s easy to search using your search function (press ctrl + f on Windows or ⌘ + f on iOS) by typing in ‘keywords’ to the search box. The following terms are the tags used in the video.
If ploughing through HTML sounds somewhat taxing, there is a handy YouTube SEO tool you can use to display the tags on page. It’s called TubeBuddy and is a Chrome extension which you’ll find in the Chrome store for free.
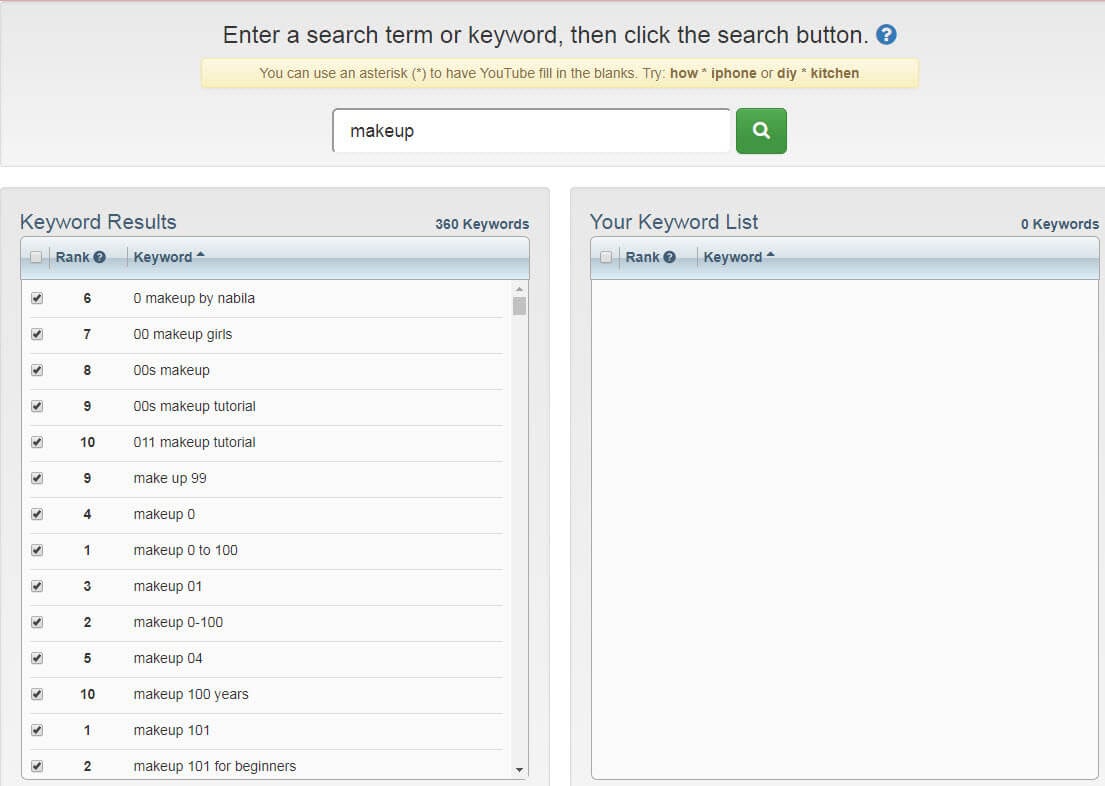
5. Keyword Tool Dominator
It’s got a grand name, but it’s actually really easy to use and a great place to start if you’re new to YouTube keyword research. Pop in your seed keywords and the Dominator will produce a list of relevant keywords related to those terms. You can then select the most useful and download them to your device.
The drawback with this is that you can only perform three searches a day on the free version. Perhaps that’s enough for you to begin with, but if you want to upgrade to the unlimited version, which will also give you search volumes, it’s a one-off fee of $39.99.
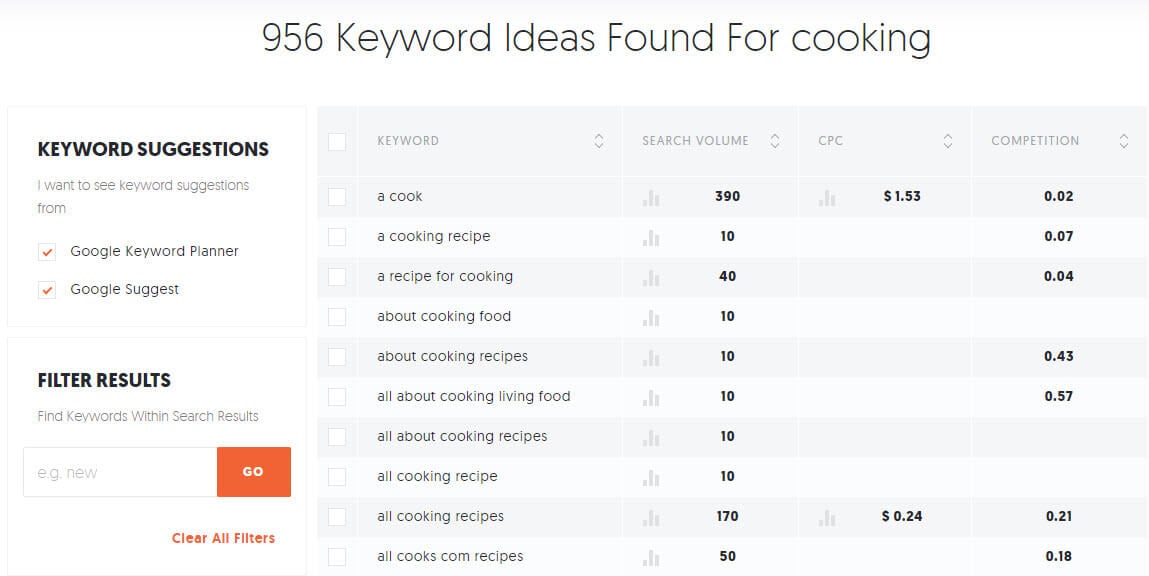
6. Ubersuggest
For getting more data on specific keywords, Ubersuggest from the SEO guru that is Neil Patel is one of the best tools out there. As well as showing search volume and competition, you can see other information such as cost per click and the seasonality of the keyword. It’s free to use with no limitations at all, so is well worth checking out.
7. Google trends
We would highly recommend investigating Google Trends as part of your YouTube keyword research, as it is powerful, accurate and, best of all, free! The options let you narrow down the trend results to just YouTube searches, which is great for gaining insights to your search terms. You can narrow down the results to a specific country too, helping you to gain insight into what your target demographic is currently interested in.
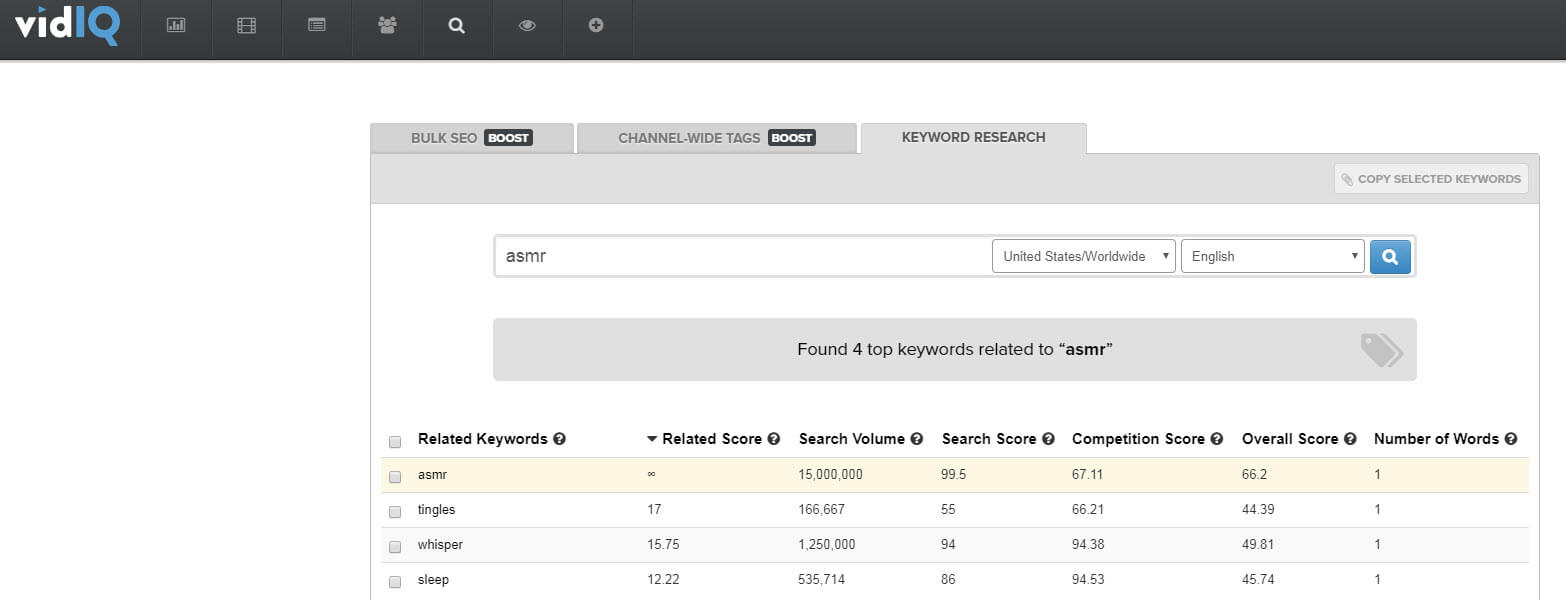
8. VidIQ
The keyword tool in VidIQ is one of very few research tools that has a function for just YouTube built in. You can paste in the keywords you want to research, choose the country you wish to target, and it will return all the search volumes and amount of competition, and will score your keywords based on these figures.
On the downside, there is a fairly complicated subscription process to go through if you want to upgrade from the free version. To be honest, the free version is OK for new users, but for in depth analytics you’re going to want to upgrade eventually.

9. Keyword Keg
Keyword Keg is definitely one of the most powerful YouTube keyword research tools out there. It offers lots of data, drawn from a variety of data sources including Wikipedia, Alibaba, Playstore and more. There are filters for country and language and you can drill down into issues like buyer intent and product info. However, as with most free YouTube keyword tools, there is a strict limit on what you can do before you pay. In this case, you only get to see the first five results unless you want to upgrade.

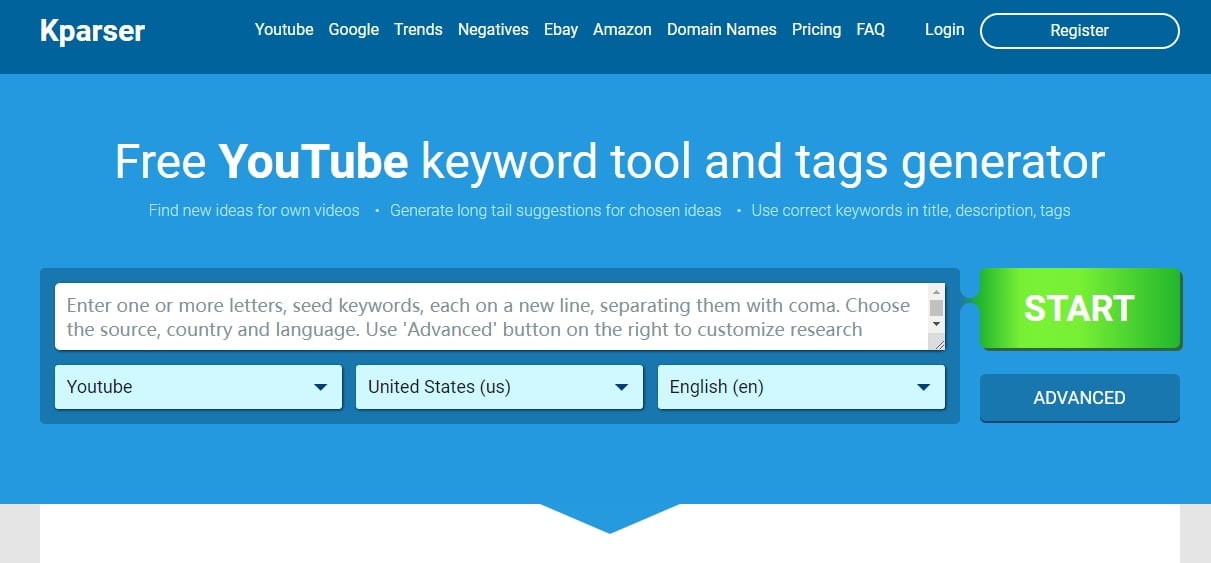
10. Kparser
Kparser is a YouTube keyword tool that you should notice. You can use it to find YouTube keywords free to use. More than finding the best core keywords, this tool can also give you suggestions on long tail keywords in every field. By use this, you don’t need to worry that you can’t the right keywords to use in title, description and tags. You also can selcet country and language when searching a YouTube keyword. For searching more than one keyword, remember to seperate them with coma.
Part 2: Bonus Tips - Google Video Result Keywords
Getting your video ranking highly on YouTube is excellent and will certainly bring you more traffic. But, do you know what would be even better than that? Getting your video ranking on Google as well.
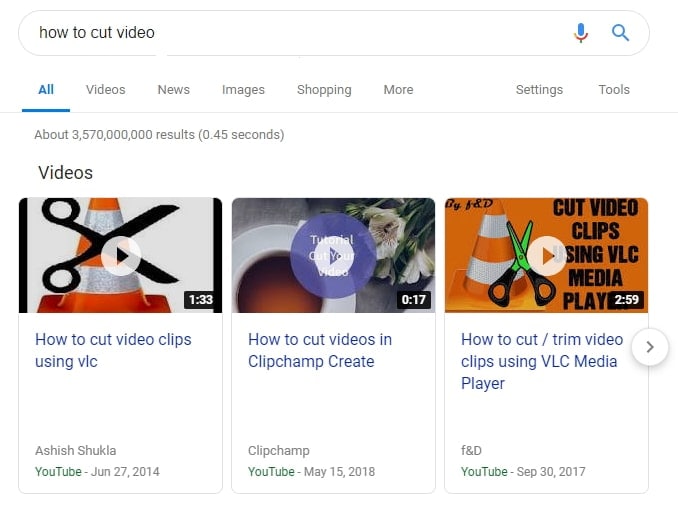
To do this you’ll need to find ‘video result keywords’ in Google, so that yours can be one of the selected videos that sometimes show up in search. Google decides what should and shouldn’t trigger a video result, and usually shows them when a video would make sense, for example when someone asks ‘how to’ or searches for ‘cute’ or ‘funny’ things.
There’s a bit of trial and error involved as there is no YouTube keyword tool to find video result keywords… yet. But you can use Google to search your keywords and see if they are video result keywords. Just type them in, and if a video appears in the listings below, you’ve discovered a video result keyword that is well worth optimizing for.
Richard Bennett
Richard Bennett is a writer and a lover of all things video.
Follow @Richard Bennett
- Title: [New] 2024 Approved Film Assembly Station
- Author: Jeffrey
- Created at : 2024-08-20 14:42:04
- Updated at : 2024-08-21 14:42:04
- Link: https://eaxpv-info.techidaily.com/new-2024-approved-film-assembly-station/
- License: This work is licensed under CC BY-NC-SA 4.0.