![[New] From Video Lessons to Vivid, Engaging GIFs – No Download Needed for 2024](https://thmb.techidaily.com/d0ab1cb7b8b22999ef087a383ed3db769492e1f7dd341f7046ddf8ecb2ad394e.png)
[New] From Video Lessons to Vivid, Engaging GIFs – No Download Needed for 2024
From Video Lessons to Vivid, Engaging GIFs – No Download Needed
How to Convert YouTube Videos to GIFs


Shanoon Cox
Mar 27, 2024• Proven solutions
A GIF adds an extra element to any conversation and makes the reader feel connected to the post. Using GIF can turn useful if done rightly. It narrates a story in a single animated image for social media conversation. In this article, we will brief you about how to convert YouTube to gif, various GIF converters, their uses, and the pros and cons of each converter.
Let’s get started!

How to Convert a YouTube Video into GIFs?
1. YouTube to GIF Directly
Here is a quick way to convert the YouTube video to GIFs without typing a YouTube to GIF website.
Gif.com is a free and easy-to-use video editor available with multiple effects. This converter was created keeping in mind how people spend hours and money on paid platforms.
Follow the below steps to convert a YouTube video into gifs.
- In the YouTube video page, add gif before youtube.com. For example, I want to convert the YouTube video https://www.youtube.com/watch?v=40fuGLmwHwk to GIFs, here is how it looks like after adding gif at the beginning: https://www.gifyoutube.com/watch?v=40fuGLmwHwk . Press the enter button on your keyboard and you will enter the gifs.com directly.

- In gifs.com, you can play and pause the YouTube video and drag the bar to select a desired moment for gif. Press the “Create Gif” button on the top right side to convert the specific part of the YouTube video to gif.
- You will then be directed to the result page to see your GIF created using the YouTube video, and you can change the GIF title and the tag.
- Lastly, you need to copy the link and share it!
Pros of converting YouTube to GIFs with Gifs.com:
- The interface is easy to use and it provides lots of tools to adjust.
- Simple functionality.
Cons:
- The watermark on your created GIF can be removed only after purchasing the premium version.
- GIFs can be downloaded only by registered users.
2. FreeGifMaker.me
FreeGifMaker is one simple online tool that allows the creation of animated Gifs for free. A minimum of two pictures has to be uploaded out of ten. It takes few seconds and is super easy to make a GIF from a YouTube video. You can use FreeGifMaker.me in some easy steps.
- Open the website http://freegifmaker.me/youtube-to-gif/ on your desktop.
- Go to YouTube and copy the video URL you want to create a GIF of and paste it on the website mentioned above.
- Then click “Load YouTube Video” below the URL and wait for a few seconds while the tool checks the video source.
- Once the YouTube video is loaded, enter the gif duration, start time, and click on the “Make a GIF button.” It will redirect you to the result page.
- Pros:
- Conversion size is unlimited**.**
- There is no usage of ads.
- Easy to make Gifs.
- Cons:
- The upload speed is slow.
- The converter gives limited options for editing.
3. Wondershare Online UniConverter
Online UniConverter converts video into a high-quality animated GIF and allows editing. It is a simple converter with unique features.
If you want to convert your YouTube video into a GIF, follow the steps.
- You need to upload your video through the “Choose Files” option. You can also copy the link from YouTube.
- Wait for some time once you upload the file; you can then set your start time, end time, frame rate according to your needs.
- Lastly, click on “Create GIF” and download your GIF. You can also save it through the dropdown option available besides “Download.”
- Pros:
- Easy to handle.
- A wide range of customization tools is available.
- Zero ads.
- Cons:
- Upload speed is slow.
- Conversion size is limited.
4. GifRun
It is a video maker that started in 2013, and GifRun converts videos from YouTube, Facebook, and other sources to high-quality GIFs. You can create Gifs free of cost from GifRun.
Here is how you can use Gifrun.
- Open the website and paste the URL you want to convert into Gif. Later, press “Get Video” option below the URL box.
- In this step, you can adjust the duration, start time, add text, and also pause and preview the video. Once you’re done altering the video, click “Create GIF.”
- Lastly, click on the “Download” button beside the add text button, or share the link directly.
- Pros:
- Fast conversion and download.
- There is no upload limit.
- The video preview feature is available.
- Cons:
- UI is ad-infested.
- Supports YouTube videos only.
5. Makeagif
This GIF converter creates high-quality GIFs in no time. You need to paste the URL in Makeagif and nothing much. It can make GIFs from Instagram, Facebook, Twitter, and other platforms easily.
The only issue is that it supports one type of conversion with a maximum limit of 25MB.
Here is how you can make your favorite GIF in few steps.
- Open makeagif.com and paste the YouTube URL in the box available.
- Once you paste the URL, the website will automatically take you to the edit page to edit GIF length, start time, speed, and add caption and stickers. The next step is to select the category to which the video belongs available on the left side of the screen.
- After editing, click on “Continue to publishing” then “Create GIF” at the lower right corner of the screen. Voila! Your GIF is ready to use.
- Pros:
- The UI is user-friendly.
- Ads are minimal
- Various GIF conversions are supported.
- Cons:
- The conversion size is small.
- Batch conversions are not available.
6. ImgFlip
It is a creative GIF website supporting various videos from other websites such as Vimeo and YouTube. ImgFlip has innovative customization tools for cropping, reshaping, adding text and, a lot more, but you just need to be aware of the ads.
Want to know how to create GIF? Go through these simple steps.
- You can make GIFs both from Video and Images. To make GIF from a video, paste the YouTube URL in the box at the top, upload the tape from your device’s file.
- After pasting the URL, you will be given lots of customization options. Choose the effect of your choice for your GIF.
- Lastly, click on “Generate GIF” available on the right side of the screen. You can now share the GIF via your device or download it.
- Pros:
- Plenty of customization options.
- Fast conversion.
- Easy to upload and use.
- Cons:
- Ads pop up frequently.
- Offline conversion is unavailable.
7. GIPHY
It is a free GIF converter that helps you download free YouTube GIFs. You can also make GIFs from your photos, videos available on your device along with video URLs and images. The only problem is, to use Giphy you first have to log in to the app.
Follow the below steps to create a GIF from YouTube videos with Giphy:
- Open Giphy on your device and click on “Create” on the top right-side of your screen.
- Paste the URL in the space given below. A pop-up will tell you to log in. Log in to the website to continue.
- The video you choose should be less than 15 seconds and under 100MB. You will be given editing options from which you can select the start time and duration of your GIF along with Captions and Tags.
- In the end, press the “Create GIF” button to make the GIF. When it’s done, you will be redirected to the GIF page. You can then share your GIF on any social media site.
- Pros:
- Ads are absent
- Uploading is fast
- Wide range of free GIFs available
- Cons:
- Not perfect for green hands

8. Imgur
It is one of the best apps that offers tons of images, memes, and GIFs. You can make GIFs of less than 60 seconds with high quality, which you can share anywhere.
Here are three easy steps to make GIFs
- Visit the page “imgur.com/vidgif” and paste your YouTube URL there.
- Set a start time by clicking or dragging on the timeline. The total runtime is also adjustable, with 60 seconds as the maximum time for GIFs.
- Lastly, press on “Create GIF” to see the magic. The GIF is converted from the YouTube video.
- Pros:
- The users can share the post of their choice
- Users can save posts.
- Great collection of short GIFs and videos.
- Cons:
- During loading, the screen flashes.
9 VEED.IO
Veed is a simple YouTube video converter that makes your work super easy. It converts YouTube videos into GIFs with various editing options like crop, trim, text ads, and many more.
Check out how to use VEED in 3 steps.
- Start by pasting the URL of your YouTube video into VEED, Your video will be ready to convert into GIF.
- Now you are all set to edit your video. You have the option to crop and trim the video. You can also include different font styles, colors, and sizes of your choice.
- Lastly, download the GIF you made in VEED.
- Pros:
- Downloading the software is not mandatory.
- UI is simple and easy to navigate.
- The subtitle option is present.
- Cons:
- It takes a lot of time to upload video.
- Many basic tools.
10. Kapwing
Kapwing is a helpful video converter that can easily turn any video into GIFs with a click. It can also convert different files such as 3GP, GIF, WEBM.
To create beautiful GIFs with this video editor, follow these easy steps.
- Open Kapwing video editor and upload your video from YouTube.
- Choose the “Export dropdown” option and choose the format you wish to convert.
You can also preview the GIF and customize it as per your choice.
- In the final step, export the video by clicking the “Export Video” button. Save and download the newly created GIF and share it anywhere with your friends.
- Pros:
- Great editing tools.
- Easy to use.
- Cons:
- Available only on the website.
- Too many tools for the same purpose.
Final Thoughts
With the increased use of GIFs on social media, you can now easily convert your favorite YouTube videos into GIFs on your own. All you have to do is simply choose the tools mentioned above and share it with your friends.
Shanoon Cox
Shanoon Cox is a writer and a lover of all things video.
Follow @Shanoon Cox
## From Free to Fortune: Unlocking YouTube's Earnings at the 500 Subscriber LevelFor small creators on YouTube, getting monetized seemed like an uphill task. You had to accumulate over 1,000 subscribers and over 4,000 public watch hours. This can be difficult to attain, especially on a platform where creators are publishing new content every day. However, the 2023 update on the YouTube Partner Program (YPP) provided an easier way to start making money on YouTube. In this article, we look at how the YPP is changing and the beauty of the YouTube monetization 500 subscribers’ policy update.
YouTube Shorts Monetization A cross-platform for helping you present your content in the best way possible!
Free Download Free Download Learn More


Part 1. YouTube Monetization Revamp: 500 Subscribers Minimum Threshold Unveiled
The recent update in YouTube monetization requirements has made it easier than ever for small creators to make money on the platform. The YPP program changed and reduced the number of subscribers needed to be eligible. It has also reduced the amount of watch time needed. Let’s have a look at what the new eligibility criteria look like:

The eligibility criteria for the YPP program are now easier and more achievable than before. To apply, you now need:
- At least 500 subscribers
- Three Shorts or Video uploads in the last 90 days
- At least 3,000 public watch hours in the last 12 months or
- At least 3 million public Short videos in the last 90 days
The new requirements are lower than the old ones. Previously, you were required to have at least 1,000 subscribers with over 4,000 public watch hours. By lowering the threshold, YouTube makes it easier for all creators to monetize their content.
Part 2. YouTube Monetization with 500 Subscribers: A Brief Guide
YouTube announced in 2022 that they were evolving the YPP to continue rewarding more creators. Starting mid-June 2023, the program was expanded to allow more creators to access monetization benefits.
Know If You are Eligible
As a creator, you will want to know if you are eligible for the YouTube monetization 500 subscribers’ plan. Make sure that the notify feature on your channel is active to receive a notification. Go to the Earn area of the YouTube channel, and select Get Notified. Once selected, YouTube will send you an email when reach above the eligibility threshold.

What You Need to Join Expanded YPP
Joining the expanded YouTube Partner Program has the same requirements as the earlier version. These include:
- Being compliant with the YouTube channel monetization policies
- Active 2-Step verification on the Google Account
- Channel is based in any of the available regions or countries
- An active AdSense account linked to the channel
- No Community Guidelines strikes on your Channel
- Have advanced features access on YouTube
Where to Apply for Monetization
After meeting the eligibility criteria, you will need to apply to be enrolled in the YPP. Remember that being eligible does not automatically translate to instant income. You need to apply for the program and wait for the approval. Here are the steps to follow:
On Computer/Desktop
Step 1Sign in to YouTube Studio on your computer or desktop

Step 2Click Earn in the left menu

Step 3Click Apply Now to review and Accept the base terms

Step 4Click Start to set up an AdSense account

On Android, iPhone and iPad
Applying for YouTube monetization on your mobile devices follows the same process as the computer. Only in this case you will using the YouTube Studio app instead of the website. Follow these steps as outlined.
- Open the YouTube Studio mobile app on your Android device.
- Tap Earn from the bottom men
- Tap Apply now to review and accept the base terms.
- Set up an AdSense account as requested, or link an existing active one.
Once you complete these steps on your computer or mobile, In Progress status will surface in the Get Reviewed step. This means that YouTube will review your channel and provide feedback within a month.
What Monetization Review Entails
Once you submit your application, YouTube’s automated systems and human reviewers will look at your channel for a while. They will review it to make sure it follows all the platform’s policies and guidelines. As the reviews are in progress, creators are encouraged to back to the Earn section of YouTube Studio regularly. Typically, you will get the results within a month, but this may be affected by several factors:
- Application Volumes
- Resource Limitations
- System Issues
- Channel requiring several reviewers to determine suitability for YPP
Sometimes the first application may not be successful for some reason. In this case, creators are encouraged to continue uploading original content and try again after 30 days. For second or other rejections, you are allowed to try again after 90 days. During this period, make sure that your channel follows YouTube policies and guidelines to increase your chances of being accepted.
Choose How to Earn
The major way of earning money on YouTube is through ads that show in your videos. In the case of Shorts, the ad-sharing revenue involves YouTube sharing the revenue generated from the ads with creators. However, getting accepted to YPP also allows you to start earning with fan funding and Shopping features. This means that creators can earn money directly from their views using these unique features
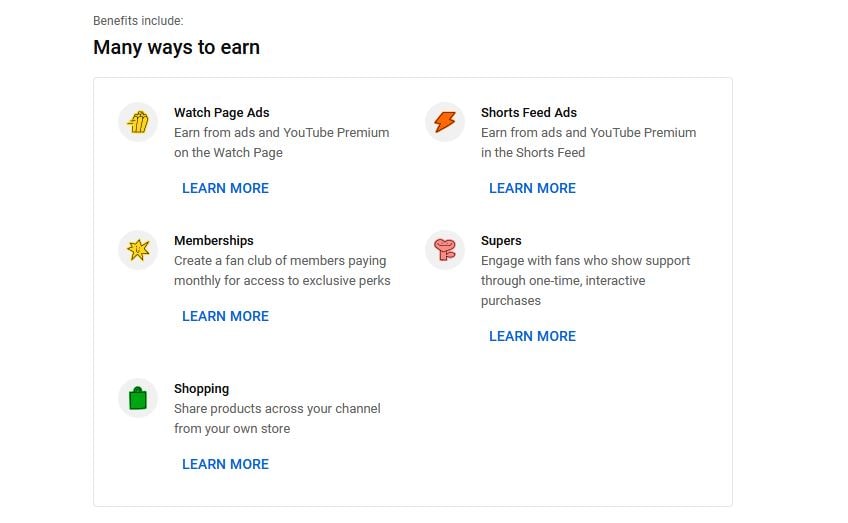
YouTube monetization 500 subscribers update allows you to earn money through monetization features that were not there before. This allows creators to interact more with their viewer while generating income. The main fan funding features include:
- Channel Membership: Offer a membership plan to your viewer through monthly payments in exchange for perks like emojis and badges.
- Super Thanks: Earn revenue from viewers who show extra gratitude for your videos.
- Super Stickers and Super Chat: Allows your fans to buy Super Chats that highlight their messages or add fun animated images in the live chat.
- Shopping: Allows you to connect your official merchandise story to YouTube to showcase your products.
Part 3. Edit Your Shorts for Monetization with WonderShare Filmora
The quality of your Shorts plays an essential role in determining whether your channel will be monetized. This is why you need good video editing software to help you present your content in the best way possible. Wondershare Filmora is a great choice when you want your YouTube Shorts to stand out. From cool green screen tricks to auto-reframing your videos for Shorts, Filmora gives you the whole editing package.
Free Download For Win 7 or later(64-bit)
Free Download For macOS 10.14 or later
Filmora offers creators fantastic editing features to create better Shorts. Let’s have a look at some of the features you may find helpful:
1. AI Copywriting
YouTube Shorts require quick content that covers everything within 60 seconds. With the Filmora AI Copywriting feature, you can get inspiration and add text to your videos. Express your thoughts more clearly and generate text that makes the video more engaging.
2. Split Screen Video Editor
YouTube Shorts are limited to a length of 1 minute only. Since 60 seconds is quite a short time, you may want to showcase your content on multiple screens. The Split Screen Video Editor on Filmora allows you to make a split screen instantly. Choose from the readily available templates and show your audience what you want from multiple perspectives in the same video.
3. Motion Tracking
With YouTube Shorts, you need to be more creative. Adding objects to your videos makes them fun and engaging. The motion tracking feature on Filmora allows you to track the movement of an object in the video. You can then pin graphics on the object, making the video more exciting. You can also add specific text and align it to an object, allowing your audience to follow through the story.

4. Speed Ramping
The way you present your video means a lot to the audience. No one wants a boring or a really slow-moving video. With the Speed Ramping feature on Filmora, you can adjust the speed of your Shorts with better control of your keyframes. This allows you to create unique cinematic effects that keep the audience wanting more of the content.
Conclusion
The introduction of the YouTube monetization 500 subscribers’ policy update was a special moment for small YouTubers. It meant that the platform was extending its YPP program to more creators, allowing them to earn money from their content. Lowering the monetization requirement gives more people a chance to make money faster. However, it is important to make sure that your videos are offering value to your audience. We recommend using Wondershare Filmora to edit your videos and make sure they stand out from the competition. The better your videos will be, the more views you will get, and the more money you will make.
Free Download Free Download Learn More
- Title: [New] From Video Lessons to Vivid, Engaging GIFs – No Download Needed for 2024
- Author: Jeffrey
- Created at : 2024-08-20 14:49:37
- Updated at : 2024-08-21 14:49:37
- Link: https://eaxpv-info.techidaily.com/new-from-video-lessons-to-vivid-engaging-gifs-no-download-needed-for-2024/
- License: This work is licensed under CC BY-NC-SA 4.0.