![[New] How to Create Animated Bouncing Text [2 Ways] for 2024](https://thmb.techidaily.com/a55de6d667ce151e4f6994d9b6a4777fce149eccc985ca7253a27ff290bf8c11.jpg)
[New] How to Create Animated Bouncing Text [2 Ways] for 2024
How to Create Animated Bouncing Text [2 Ways]
How to Create Animated Bouncing Text

Liza Brown
Mar 27, 2024• Proven solutions
Earlier, you learned how to have a bounce text effect in Adobe After Effects . However, because AE is a complex application and has a steep learning curve, this section explains the two alternative ways to get the same effect on your existing video footage.
Method 1: How to Create Bouncing Text in Filmora Video Editor?
When talking about Wondershare Filmora , the application is populated with several presets for texts and titles, animations, effects, filters, and much more.
These pre-built templates not only make your task easier, they also save your decent amount of time that you would spend while working with After Effects or any other similar app that requires you to build things from scratch.
You can follow the instructions given below to add animated bounce text to any of your video footages with Filmora:
Step 1: Add a Footage to Timeline
Launch Wondershare Filmora on your Windows or Mac PC. By default, the aspect ratio of the project is set to 16:9. Click anywhere inside the Media window at the upper-left section, and select and import footage you want to add bounce text to.
Step 2: Insert Text and Add Bounce Effect
Click Titles from the standard toolbar at the top, and click and drag your preferred title template from the Library to the timeline. In case you don’t want any specific animation or style on the title, you can use the default title.
In the timeline, double-click the title you just added, use the upper-left section to edit the text, go to the Animation tab from the left pane, scroll down the list, and double-click the Up Down 1 or Up Down 2 preset to apply the bounce effect to the credits. Click OK to save the changes and to get back to the main window.

Step 3: Add Shake Filters
Go to Effects from the standard toolbar, expand the Filters category from the left pane, and click Shake. From the Library window, click and drag your preferred shake filter to the timeline. Here, I will choose Mild.

You can customize the default effect by double-clicking the shake filter in the timeline, using the sliders in the upper-left area of the interface to make necessary adjustments, and then clicking OK to save the changes and to get back to the previous interface.


Step 4: Export the Final Output
Click EXPORT from the top of the interface, go to the Local tab in the Export box, choose your preferred output format from the list in the left, make required customizations from the right pane, and click EXPORT from the bottom-right corner to export the video.


Now, you can add the bouncing text video and the background video to the timeline, and then place the bouncing text video above the background video track.
Double click the text track, go to the Chroma Key effect, select the Color Picker tool, and click anywhere in the Preview window to get things right. Finally, export the entire project to your preferred output format as explained in Step 4.
As explained before, Wondeshare Filmora makes the entire process of creating and adding bounce text effect pretty simple. With all the pre-build templates, and the versatility of the options that can be used to customize those presets, you can come up with the effects that are usually obtained when you start generating them from the scratch.


Method 2: Generate Animated Bouncing Texts Online
If you don’t want any heavy and resource-intensive app on your PC merely for some special text effects, you can try any of the online solutions instead. The benefit of using any such web app is that all the processing is done on site’s server, and it is only a web browser and an Internet connection that you need to have at your side.
Some most trusted websites to generate bounce text are listed below:
1. ENGFTO
Website: https://engfto.com/index/create%5Fanimated%5Fbouncing%5Ftext/0-26

You can follow the instructions given below to use Engfto to generate bouncing text for your footages:
Step 1: Get to the Animated Bouncing Text Page
Launch your favorite web browser, and go to the link given above to get to the Engfto’s animated bouncing text page.
Step 2: Customize Text and Preferences
Modify the values in the fields under the SIZE AREA and TEXT sections to customize the text area, the text itself, its size, and font. Next, adjust the values in the fields under the EFFECT PARAMETERS section to get the required bounce effect. Also, use the fields under the BACKGROUND section to either change the background color, or pick a background image from your PC.
Step 3: Obtain the Animated Text
Click the SAVE GIF ANIMATION button from the lower section of the page to download the animated text to your PC.
2. Loading.io
The instructions given below explain how to use Loading.io to get animated bounce text effect for your footages:
Step 1: Get to the Loading.io Webpage
Launch your favorite web browser and go to https://loading.io/animation/text/ .
Step 2: Customize the Text and Choose Animation Effect

Use the options available on the webpage to type your text, and change its font, color, background, transparency level etc. Select Bounce (or any of its variants) from the Animation drop-down list, and adjust the speed using the Speed slider.
Step 3: Obtain the Text
Click your preferred option from next to the Download As section to download the animated text to your PC.
Note: Regardless of the web solution you choose to generate and obtain animated bounce text, you will still need a post-production tool to add the downloaded text to your footage.
Conclusion
Generating bounce text effect is much simpler when you use Wondershare Filmora or any of the online solutions as explained in Method 2. While the former gives you more flexibility when it comes to customizations, the latter doesn’t require any app to be installed on your PC. In addition, many times the web apps offer their services for free, and therefore they are preferred by the novice users who are not much into post-production processes.
Liza Brown
Liza Brown is a writer and a lover of all things video.
Follow @Liza Brown
Your Comprehensive Pathway to Hidden YouTube Treasures
You may have noticed that some videos in your YouTube playlist are unavailable. This is because the platform allows content creators to categorize their videos into public, private, or unlisted based on their preferences.
To help you uncover the content that you otherwise wouldn’t have access to, we’ve compiled a detailed guide to show you how to find YouTube hidden videos. We’ve also explained why so many unlisted videos are now labeled as private.
So, let’s get started with our guide without any further delay!
4 Types of Videos on YouTube
Firstly, let’s learn about the background of the types of YouTube videos. YouTube videos fall into the following four broad categories:
Public Videos: YouTube contains videos on many themes and topics. It makes it impossible to watch all uploaded content under a specific category.
So, whenever you search for a video or theme, a list of content is displayed in the search result: “Public Videos.” It means that they are visible to everyone around the globe (depending on the terms and conditions). Moreover, you can share, like, unlike, download, or add these videos to your playlists for later watching.
Private Videos: Private videos on YouTube can only be seen by people invited by the person who uploaded the video. This means that only those with access to the video’s shareable link can watch it.
Private videos are not visible to the public or to people who are not logged into YouTube. Hence, it is a great way to share sensitive or personal information with a select group.
Unlisted Video Unlisted videos on YouTube are not publicly visible on the site. They can only be seen by people who have the URL. This category works as a bridge between private and public videos. It is accessible only through sharable links without appealing in any YouTube public playlist or search result.
You might upload an unlisted video to YouTube if you do not want everyone to see it. However, you still want to share it with specific people, like your friends or family. You might also use an unlisted video to test out a new idea before making it public on the video-sharing platform.
Age-Restricted Videos: Age-restricted videos on YouTube are not suitable for all audiences. It may contain content that includes violence, profanity, sexual content, and other inappropriate material. YouTube requires that users be at least 18 years old to view these types of videos.
If you search on YouTube and come across an age-restricted video, you will be asked to confirm your age before viewing its content.

How To Find Unlisted YouTube Videos
Now that we’ve learned about the four types of YouTube content, let’s discuss how you can find unlisted YouTube videos:
How To Find Other People’s Unlisted YouTube Videos?
Since unavailable videos in YouTube playlists are hidden from general public viewers, you cannot find them on YouTube or Google search results.
However, the following workaround can help you watch these YouTube videos without facing much trouble:
Step 1: First, open a browser on your PC and visit the Unlisted Videos website. This platform contains over 600,000 unlisted YouTube videos from 2016 and earlier. You can also submit your unlisted video on the site.

Step 2: Use the search bar at the top of your screen to search for other people’s YouTube playlists. You can also click the “All Video” or “Random Videos” option to find the hidden content of a user.
How To See Unlisted Videos on My YouTube Channel?
To see your unlisted videos on your YouTube channel, do the following steps in sequence:
Step 1: In the first step, install the YouTube Studio app on your mobile device or visit its website using a browser on your computer. Next, launch the app and sign in to your channel’s account using your email and password.
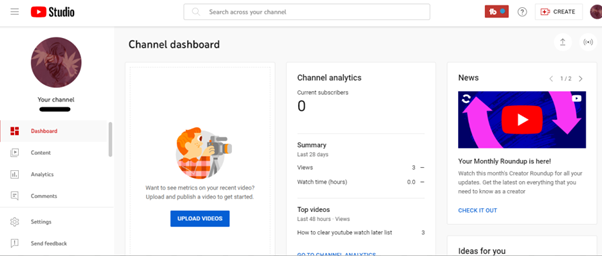
Step 2: In the next step, tap/ click the “Content” tab and tap/click the “Funnel” icon at the top of the video list to access the visibility options.
Step 3:
- Now, choose the “Visibility” option.
- Select “Unlisted” to change the visibility.
- Click the “Save” option to apply changes.
- See the hidden videos on your channel.

Since YouTube has marked the videos uploaded before 2017 as private as of July 2021, you can find your old unlisted videos under the “Private” list. To access it, choose “Private” as the visibility option.
How To Find Unlisted YouTube Videos with Google
Sometimes, unlisted YouTube videos appear on Google when someone shares the link to them on a public forum or website.
To confirm this, open a browser on your computer or a mobile device, head to the Google website, and search for your query. With some luck, you can find these unlisted YouTube videos in the search results.
You May Want to Know: Why Are So Many Unlisted Videos Now Private?
All unlisted videos uploaded to YouTube before January 2017 were switched to private. Therefore, if you have any older unlisted videos added to your Playlist or embedded on your website, you won’t be able to access them now.
However, the channel’s owner can restore access to the video by switching it back to unlisted or public. If now, the video will be labeled as “Private” indefinitely or until its settings are changed.
Conclusion
In this detailed guide, we’ve explored the four types of videos on YouTube and how to find YouTube hidden videos in three different ways. We’ve also explained why so many videos are now listed as “Private” and inaccessible.
Hopefully, you’ve found this article helpful and can now access the unlisted videos on YouTube without hassle.
You may have noticed that some videos in your YouTube playlist are unavailable. This is because the platform allows content creators to categorize their videos into public, private, or unlisted based on their preferences.
To help you uncover the content that you otherwise wouldn’t have access to, we’ve compiled a detailed guide to show you how to find YouTube hidden videos. We’ve also explained why so many unlisted videos are now labeled as private.
So, let’s get started with our guide without any further delay!
- Title: [New] How to Create Animated Bouncing Text [2 Ways] for 2024
- Author: Jeffrey
- Created at : 2024-08-20 15:05:41
- Updated at : 2024-08-21 15:05:41
- Link: https://eaxpv-info.techidaily.com/new-how-to-create-animated-bouncing-text-2-ways-for-2024/
- License: This work is licensed under CC BY-NC-SA 4.0.