![[New] In 2024, First Steps in YouTube Tech A Comprehensive List](https://thmb.techidaily.com/9b6869e231e2667ce5b62099e4b236daaa6b93b4b1b8e67663aad45fe3a9f4b0.png)
"[New] In 2024, First Steps in YouTube Tech A Comprehensive List"
First Steps in YouTube Tech: A Comprehensive List
YouTube Equipment Starter Guide For Beginners

Sumia Rafique
Feb 19, 2024• Proven solutions
If you want to start creating videos and uploading them onto YouTube, you’ll need to have access to some basic equipment. This guide will go over everything you’ll need to be a YouTuber.
Part 1: YOUTUBE EQUIPMENT: CAMERA
The best camera for beginners is the one you already have. Most smartphones these days already come equipped with a powerful camera that can record HD videos. If you still want to add a camera to your equipment list as a beginner YouTuber, you should look for a camera with the following eight qualities:
What To Look For In A Camera As A YouTuber
1. Fully articulated screen (flip screen)
2. Good continual auto focus while recording video
3. Good focus priority through face recognition
4. Touch to focus
5. Good low-light performance
6. external mic jack, hot/cold shoe bracket
7. optical image stabilization
8. good battery life
Check out my full list of 10 Things To Look For In A Vlogging Camera to understand the importance of these camera features.

Best Cheap Vlogging Cameras
Below are the best cheap vlogging cameras that you can get for under $500. They all record at least 1080p HD video and all but the Sony Alpha a5100 come with optical image stabilization (if you want OIS with the Sony a5100, you’ll have it get it in the lens).
| Camera | Release Date | Camera Type | Flip Screen | 4K | Price | |
|---|---|---|---|---|---|---|
| Yi 4KAction Camera | 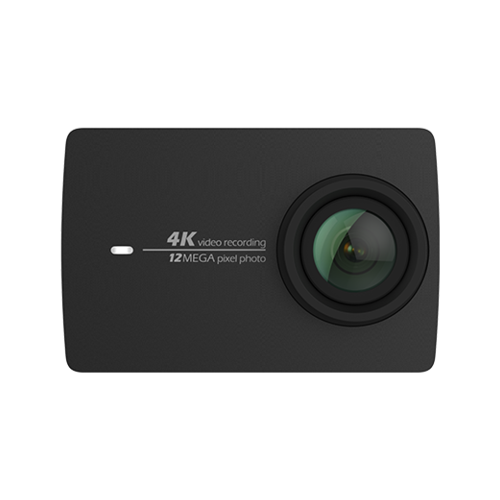 |
February2017 | Action Camera | No | Yes | $169 (MSRP) |
| NikonCoolpixA900 | 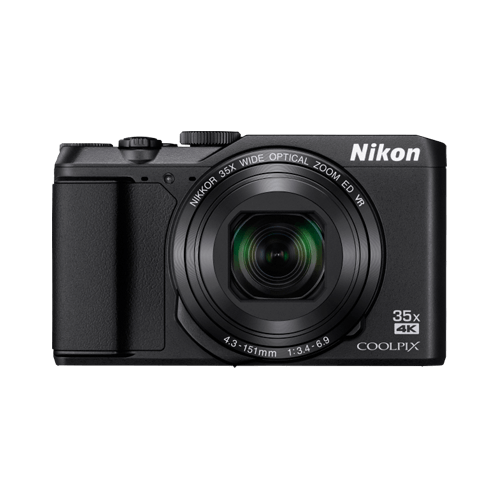 |
February2016 | Compact | Flip Up | Yes | $399 (MSRP) |
| NikonCoolpixB500 | 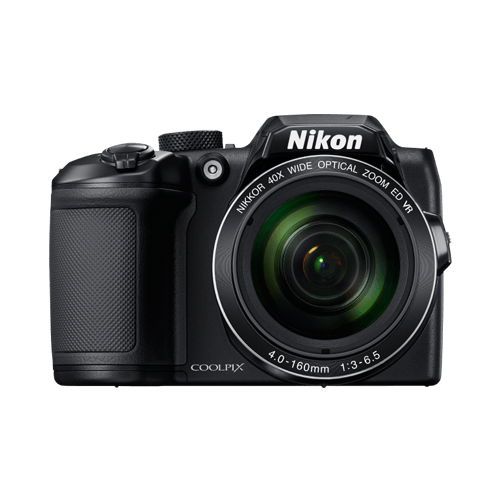 | February2016 | SLR-like (bridge) | Tilting | No | $250 (MSRP) |
| PolaroidCube+ | 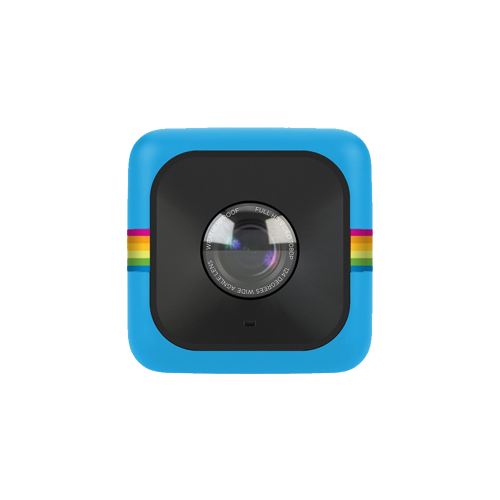 | June2015 | Action Camera | No | No | $99 (MSRP) |
| SonyAlphaa5100 |  | August2014 | Mirrorless | Flip Up | No | $450 (MSRP) |
|
Best cheap vlogging camera under $100: Polaroid Cube+ Even before GoPro released their GoPro Session, Polaroid was the first to come out with a 1.4-inch, cube-shaped action camera, small enough to mount on a bike or a helmet. This camera has built-in magnets so that you can attach them to metal surfaces. This action camera is water-resistant, shock-proof, and weather-proof. It can record full HD 1080p videos at 60 fps with its wide-angle lens. You can connect this camera with your phone to preview and take your shots. |
|---|

| | Best cheap vlogging camera under $200: Yi 4K At $200, you can record 4K videos with the Yi 4K action camera. Like many other action cameras, this camera is small, durable, and shoots through a wide-angle lens. You won’t be able to take this camera underwater though because it isn’t waterproof. You’ll need to buy the right accessories for that. |
| | Best cheap vlogging camera under $300: Nikon B500 The Nikon B500 gives you a non-interchangeable zoom lens so that you have more control over how you compose your shots. This camera records full HD 1080p videos at either 30 or 25 fps. You can only set its ISO as high as 3200, so it’s not going to perform the best in low-light conditions. The tilting LCD screen does not have touchscreen and cannot be fully flipped up or flipped to the side, it only tilts. For a camera in its price range, the Nikon B500 offers a lot of features. |
| | Best cheap vlogging camera under $400: Nikon A900 The Nikon A900 not only comes with a non-interchangeable zoom lens, but it can also record videos in UHD 4K quality. Like the Nikon B500, the A900’s ISO goes only up to 3200, making it a weak performer in poorly lit conditions. |
| | Best cheap vlogging camera under $500: Sony a5100 Among the cameras listed in our top cheap cameras list, the Sony a5100 is the only one you can interchange lenses with. All Sony E-mount lenses are compatible with this camera. This camera can record up to 1080p videos at 60 fps. Out of all of the above top cheap cameras, this one also auto focuses the best. |

Best Entry-Level and Mid-Range Vlogging Cameras
If you have a bigger budget to work with, the following vlogging cameras are great options:
| Camera | Release Date | Camera Type | Flip Screen | Mic Port | Price |
|---|
| CanonEOSM50 |  | February2018 | Mirrorless | Fully Articulated | Yes | $- |
| CanonEOSM100 |  | August2017 | Mirrorless | Flip Up | No | $ |
| CanonEOS RebelSL2 |  | June2017 | Compact SLR | Fully Articulated | Yes | $ |
| CanonEOS RebelT7i |  | February2017 | Mid-size SLR | Fully Articulated | Yes | $- |
| CanonEOS80D | 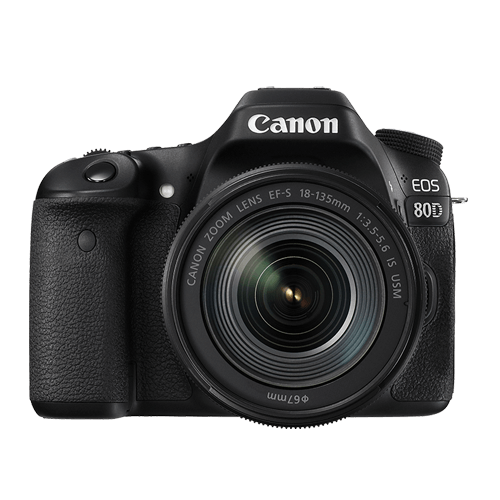 | February2016 | Mid-size SLR | Fully Articulated | Yes | $$ |
|
Best entry-level mirrorless camera for vlogging: Canon EOS M100 The Canon M100 is a small and powerful camera that can shoot full HD (1080p) videos up to 60 fps. The touchscreen LCD of this camera flips up so that you can see yourself as you vlog in selfie mode. |
|---|

| | Best mid-range mirrorless camera for vlogging: Canon EOS M50 The Canon EOS M50 can shoot UHD 4K videos at 23.98 fps. You can also record 120 fps slow-motion videos at 720p. Unlike the M100, which only has a flip up screen, the M50 has a fully articulated screen, so you can use this camera in selfie mode, all while using an on-camera shotgun microphone attached to the camera hot/cold shoe. |
| | Best DSLR camera for daily vlogging: Canon EOS T7i The Canon EOS T7i is a great DSLR camera for daily vlogging. It can record full HD 1080p videos at 60 fps, it can create HDR and time-lapse movies, and it also has a fully articulated screen. |
| | Best entry-level DSLR camera for vlogging: Canon EOS SL2 The Canon EOS SL2 delivers a lot of power at a low price. This DSLR camera can capture full HD 1080p videos at 60 fps. |
| | Best mid-range DSLR camera for vlogging: Canon EOS 80D The Canon 80D is an exceptional mid-range DSLR vlogging camera with many features. Coming with a 45-point all cross phase detection autofocusing and a dual pixel CMOS AF system, the camera is great at finding the right focus while recording video. |
Parental Control Software
## Part 2: YOUTUBE EQUIPMENT: LENSA lot of compact cameras already come with the lens as a part of the camera body. When it comes to these kinds of cameras, you won’t have to worry about which lens is right for you since the decision has already been made for you!
When you start looking into bigger cameras, though, you’ll have to think about which lens you want to shoot with.
The Wide-Angle Lens
Every YouTuber should have a wide-angle lens. With this kind of lens, you can fit much more of a scene into your camera frame, including your own face when you’re just an arm’s length away from your camera. This is especially important for YouTubers because most YouTubers have to operate their camera on their own, without the assistance of an additional camera person.
Optical Image Stabilization
You should also look for a lens with optical image stabilization if you’re shooting a lot of your YouTube videos handheld.
For more information on camera lenses, check out my Vlogger’s Guide To Camera Lenses .
Part 3: YOUTUBE EQUIPMENT: TRIPOD
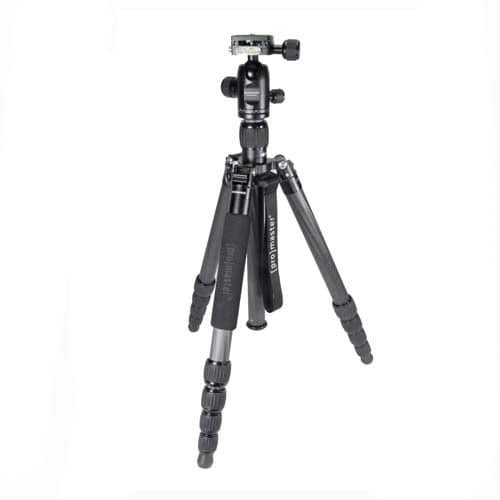 |
Tripod If you plan to film yourself talking in front of the same, unchanging background for an extended period of time, it doesn’t make sense to film yourself handheld the entire time. You’ll just end up tiring your arm out and adding distracting shakiness to your footage. A tripod is a great solution to this problem. You can set up your framing once, press record, and leave your camera in its fixed position while you talk with both hands free. |
|---|---|
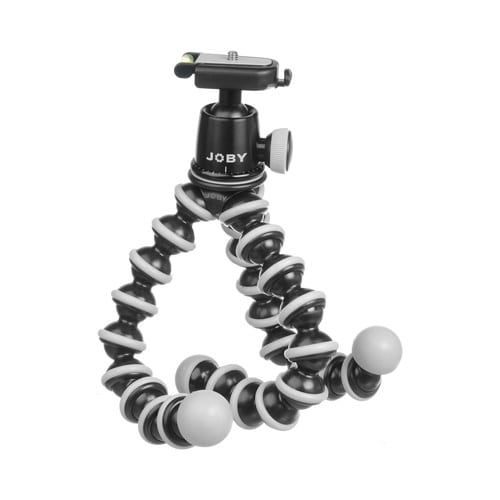 |
Joby GorillaPod With Ballhead When you film yourself handheld, it’s difficult to keep your arm higher up so that your camera shoots down at an ideal angle. You may also notice that a lot of your arm gets into your shot, which you and other viewers might find distracting. Holding your camera up by a GorillaPod, however, can give you the extension you need to get that higher angle shot more easily, all without so much of your arm getting into your shot. |
Part 4: YOUTUBE EQUIPMENT: MICROPHONE
Most vlogging cameras come with a built-in microphone that gets the job done. If you want higher quality audio recordings, though, you should check out the following list of top microphones.
| Top Condenser Mics For Music and Singing | Top Condenser Mics For Voiceovers-Podcasts, Interviews | Top On-Camera Shotgun Mics | Top Shotgun Mics | Top Low-Profile Lavalier Mics |
|---|---|---|---|---|
| Audio-Technica AT2035 Rode NT1-A AKG C214 | Apogee Mic 96K Blue Yeti Rode NT-USB Blue Snowball Audio-Technica AT2020 Rode Procaster | Rode VideoMic Go Shure VP83 Rode VideoMic Pro+ Sennheiser MKE 440 | Rode NTG-3 Audio-Technica AT4053B Sennheiser MKH416 | Rode SmartLav+ Audio-Technica ATR3350iS Sennheiser ME2 |
To read more about each of these microphones, check out our post on The 19 Best YouTube Microphones 2018 – Options for Music, Voiceovers, Vlogging, and more!
Part 5: YOUTUBE EQUIPMENT: SMARTPHONE ACCESSORIES

Using your smartphone’s camera to film your YouTube videos is a great idea since it’s light, portable, and most likely always with you. The following six smartphone accessories can help you make better YouTube videos:
- Arkon Tripod Mount
- FLII Selfie Ring Light
- RODE VideoMic Me
- Aukey Optic 3-in-1 Smartphone Lens Set
- iOgrapher Go for Android and iPhone
- Manfrotto TwistGrip System
Read about each one of these items and more in The 9 Best Smartphone Camera Accessories For Vloggers .
Part 6: YOUTUBE EQUIPMENT: LIGHT
Lighting for home living and lighting for filming is very different. If you try to make use of just the lights you have at home, you may find that your footage is too dark, grainy, and orange-tinted.
The solution to this problem is getting additional video lighting equipment with daytime light bulbs.
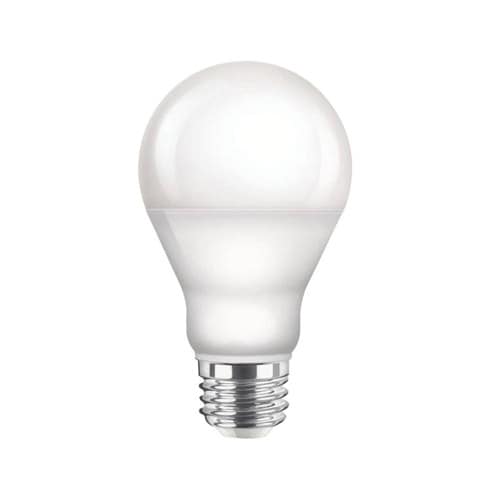 |
Daytime Light Bulbs Your home is most likely lit with incandescent light bulbs that illuminate orange-tinted light. You can remove those light bulbs and replace them with daytime light bulbs that illuminate more of a white colored light. |
|---|---|
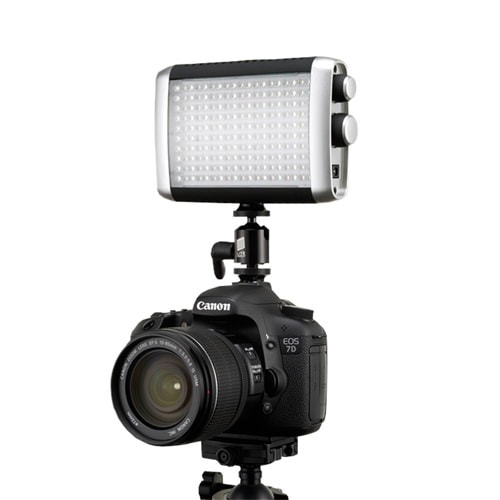 |
On-Camera LED Light If you need more light just in front of the camera and you need this light to be portable, LED lights that attach to your camera’s hot/cold shoe will do the job. |
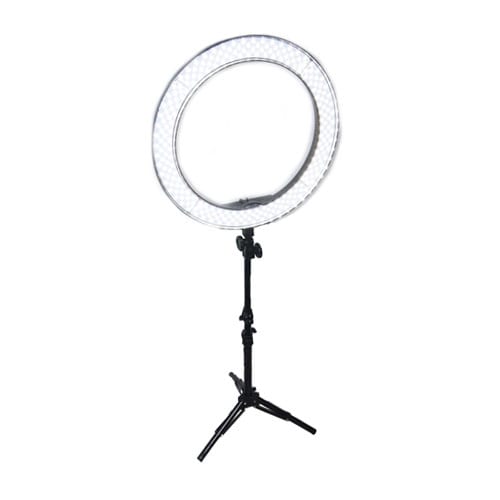 |
LED Ring Light If you need more light just in front of the camera, you don’t have a lot of space, and you don’t need this light to be small and portable, an LED ring light is the best piece of equipment for you. You can position your camera inside the circular space of the ring light. This kind of light also gives your eyes the circular shaped highlight that many people like to see. |
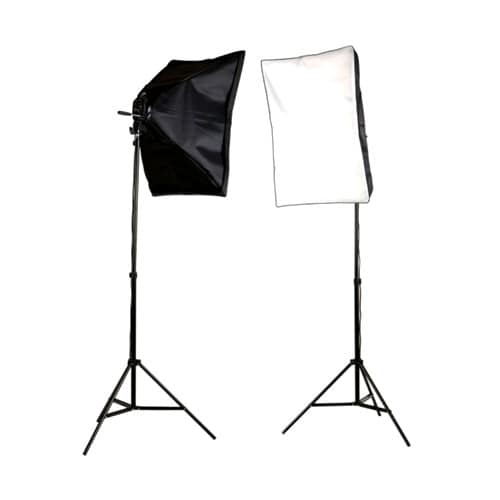 |
Softbox Video Light If you need more light and have more space, another piece of lighting equipment good for beginners is a softbox video light. |
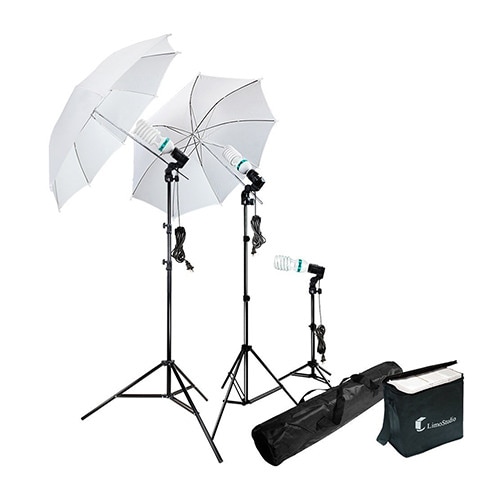 |
Umbrella Video Light Umbrella video lights are very portable and affordable. The direction of the light from umbrella lights are more difficult to control than the light from softbox video lights. |
If you’re looking for recommendations on which piece of lighting equipment to buy, check out my list of the Top 17 Video Lighting Equipment For YouTubers .
Part 7: YOUTUBE EQUIPMENT: COMPUTER
After you’ve recorded all your footage, you’ll need a computer to edit your video clips together. You can perform basic video editing tasks and upload your video onto YouTube with any computer less than ten years old.
Laptop computers are popular among YouTubers because their portability allows you to work on your videos from anywhere. This way, you can finish and upload your videos more frequently, which is another important part of being a YouTuber.
The following three laptop computers handle video editing very well:
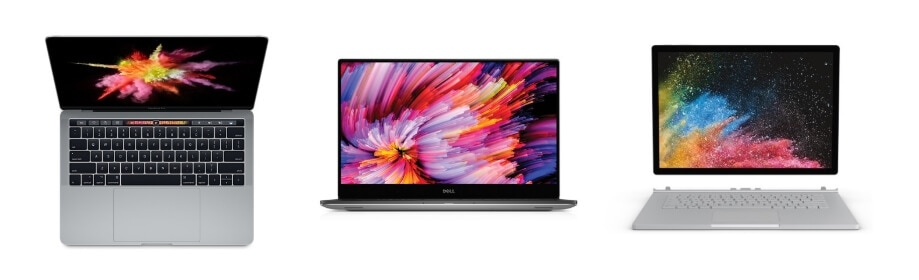
- MacBook Pro With Touch Bar
- Dell XPS 15
- Microsoft Surface Book 2
Read more about these laptop computers for 4K video editing in The Best Laptops for 4K Video Editing .
Part 8: YOUTUBE EQUIPMENT: VIDEO EDITING SOFTWARE


| FREE VIDEO EDITING SOFTWARES | PAID VIDEO EDITING SOFTWARES |
|---|---|
| OpenShot Video Editor (Windows, Mac, Linux) ShotCut (Windows, Mac, Linux) Hitfilm Express (Windows, Mac) VideoPad Video Editor (Windows) Lightworks (Windows, Mac, Linux) VSDC Video Editor (Windows) Machete Video Editor Lite (Windows) Avidemux (Windows, Mac, Linux, BSD) Read more about each of these softwares in our post about The Best Free Video Editing Software for YouTube . | Filmora Video Editor (Windows, Mac) - $40 one year license, $79.99 perpetual license. Free trial Final Cut Pro (Mac) - $299.99, Free trial Vegas Movie Studio (Windows) - $49.99 |
YOUTUBE EQUIPMENT: AUDIO
Music Libraries
Music is an important part of YouTube video creation. Here’s where you can get access to music:
| ROYALTY-FREE MUSIC LIBRARIES | PAID MUSIC LIBRARIES | PAID SUBSCRIPTION MUSIC LIBRARIES |
|---|---|---|
| Audionautix Bensound dig.ccMixter Free Music Archive Free Stock Music Incompetech Josh Woodward Moby Gratis Musopen Purple Planet Music TeknoAXE YouTube Audio Library | Premium Beat Audio Jungle | Audio Network Audio Blocks Epidemic Sound |
Sound Effects
Free Sound Effect Sites
- Filmstock Sound Effects
- Freesound
- PacDV
- Sound Bible
- Sound Gator
- Sounds Crate
- Zapsplat
Sumia Rafique
Sumia Rafique is a writer and a lover of all things video.
Follow @Sumia Rafique
The Ultimate Guide to Free Converting YouTube Videos to WAV
YouTube to WAV File: 4 Best Free Convert Solutions

Richard Bennett
Mar 27, 2024• Proven solutions
YouTube to WAV converter is a very common phenomenon. This is done by the users as they want to play the video on selected devices.
In this article, we will help you manage to convert YouTube to WAV file with ease.
You will Learn :
- What is WAV?
- How to Convert YouTube to WAV Format? (4 Options)
- Tips to Convert YouTube to WAV
- Beside WAV Other Popular Formats for YouTube Videos
What is WAV?
WAV, known as Wave Form Audio File Format and is fully supported by Windows, is a common format that was launched back in 1991, which supports most of the older devices as well.
For the users that want uncompressed and lossless quality prefer to use WAV format. It is extended from the RIFF format to the RF64 format.
How to Convert YouTube to WAV Format?
Some many ways and programs can be used as YouTube to WAV converter. All these programs are easy to use and definitive guides are also available online. Some of the best ways are mentioned below.
Option 1: Convert YouTube to WAV by Wondershare Filmora
Filmora is by far the best program that can be used to convert YouTube to WAV format. YouTube to WAV file conversion has never been as easy as it is with this program. The program is easy to use and allows the users to overcome the issues which other programs present.
Features of the Program
- It is one of the very few programs that come with split-screen functionality. It means that the video and audio can be played simultaneously on a single interface.
- The audio equalizer ensures that the tuning is done as per the requirements.
- There is an advanced functionality of text editing which allows the users to mention the text onto the converted video as well.
- The UI of the program is graphical and hence it is easy to use. The independent reviews have granted a score of 9.5 based on this functionality of the program.
- The part selection is available in the program. It means that multiple conversions can be done at the same time without losing quality.
How to Convert YouTube to WAV Using Filmora?
This YouTube WAV converter is easy to use. The best part is that it is compatible with major platforms i.e. Windows and Mac. The processes for both will be explained in detail so that you can understand the program better.
The Process to Convert YouTube to WAV:
Step 1: Download Filmora for Windows or Mac (depends on your operating system).
If you want to download the program for Windows then click below download icon:
For Mac version download click below icon:
Step 2: There are three ways to import media into the program.
Methond 1: Click File > Import Media. Choose the YouTube file that you want to convert to WAV format. If the file is on another device then you can get it from there as well.

Method 2: Click Import Media on the main interface and select the file from the window that pops up.
Method 3: You can also drag and drop the files onto the interface to make sure that they are imported.
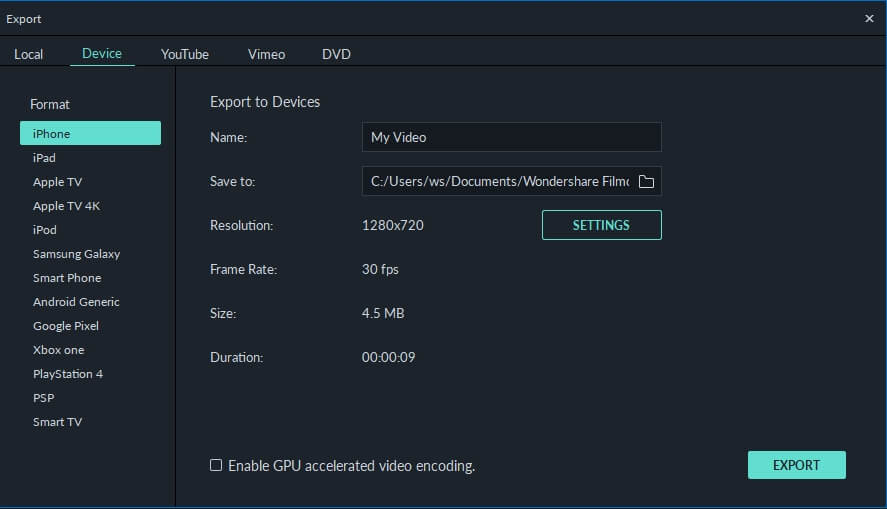
Step 3: You now just need to export the video in the WAV format. Click the Export button and then go for the Local tab. The export formats that are currently supported by the program are WMV, MP4, AVI, MOV, F4V, MKV, TS, 3GP, MPEG-2, WEBM, GIF and MP3.

Step 4: You can then alter the settings within the settings tab. The bit rate is the main thing that defines the quality of the video. Once the settings are done press OK
Step 5: You can also export the video as per the device that you want to play it on.
Step 6: You can also upload the video to social media platforms such as YouTube and Vimeo.
Step 7: You can also burn the converted format onto a DVD. Select the appropriate settings and press Export.
The process is explained as under. For video guides please visit Filmora 101 as it will get you the complete knowledge thoroughly.
You may also like: How to Convert YouTube to MP4 Safely? [Step by Step Guide] >>
Option 2: Other Way to Convert YouTube to WAV on Windows
5K Player is one of the best and the most used players that also work as YouTube to WAV conversion platform as well. The process is very easy to follow and is mentioned as under.
Step 1: Copy and paste the URL of the video on the desired location within the player. Click download and the process starts.

Step 2: Click “To Music” and select the WAV format from the drop-down that appears. You can also choose the bit rate, frame rate, and resolution. Once the conversion is completed you can save the file and the process ends here.
You may also like: >> How to to Convert WMV to MP4 Easily?
Option 3: Other Way to Convert YouTube to WAV on Mac
The Allavsoft is one of the best converters that can be used to convert YouTube to WAV on Mac. The process is simple and has been explained as under.
Step 1: Paste the URL of the YouTube video that you want to convert. You can also select the download quality and can access the file once the download has been completed.

Step 2: You can then select the format and once the conversion has been completed click the download button. The same has been depicted by numbers 2 and 3 in the picture below. WAV lossless quality should be selected from the dropdown to make sure that the work is done without any issue and problem.
Right format selection is important as the conversion is done instantly.
Option 4: YouTube to WAV Conversion Online
The process that you need to follow is explained as under.
Step 1: Visit https.//www.savethevideo.com/convert to access the converter.
Step 2: Paste the URL of the YouTube video that you want to convert and click the “Convert” button:

Step 3: Wait till the converter fetches the information.
Step 4: From the drop-down make sure that you select the WAV format.
Step 5: Click “Convert” once again and the process of conversion starts.
Step 6: The video then starts to download in the desired format.
Step 7: Click “Download” and save the file to the desired location. This concludes the process in full.
Tips to Convert YouTube to WAV
Below are some tips that would be useful for the users that want to convert YouTube to WAV format.
1. Always use the multipurpose software. It will allow you to download and convert the video at the same time-saving time.
2. Lossless quality is always to be selected while you are converting the format. It will make sure that the video is never compressed at all.
3. One of the best ways to convert the video is to disable the background noise. This will lead to awesome results.
4. Converting from YouTube to WAV also requires you to choose the software that is fast and reliable or else you will get the outcome which is not as per your requirements.
5. Free software programs can also get the malware to your system and therefore these are not recommended at all.
6. WAV is a format that is of high quality as the converters have loads of options so it is advised to use these carefully.
7. Make sure that the converters that are used are the ones that are highly rated and have a graphical user interface.
8. The YouTube to WAV downloader should be there on with the converter as it will make the process easy and you don’t need tons of software programs for a single purpose.
9. Always go for the program that supports the containers instead of just the format. If a program supports the containers then it is easy to convert a number of formats.
10. The conversion should be done with converters that do not cause any type of loss to enhance the quality as well.
Beside WAV Other Popular Formats for YouTube Videos
Many other video formats should be used to make sure that the best and the most advanced outcome is generated. Some of the most popular formats are as under.
- Audio Video Interleave Format, AVI
It is one of the oldest formats that are on the market. It was developed by Microsoft as a part of their video processing format for Windows. It was made publically available in 1992.
This one of the oldest formats is used universally. Many people consider it the standard to save videos. The AVI files are simple to use and are supported by almost every video player currently on the market.
It is easy to store as it takes less space than many other formats that are on the market. It will also let you transfer the files relatively faster due to the small size.
- Flash Video Format, FLV
The flash player by Adobe is one of the most common software programs on the system. This has made this video format one of the common ones on the market. The format can be played with ease as the supported plugins are there for other apps as well.
The flash content is supported by all browsers and therefore it is common to play these videos without any additional plugins. The best part of this format is the lossless quality that it provides to its users. Even if you compress these videos they remain HD as the quality remains the same.
- Apple QuickTime Movie, MOV
Among the Mac users, it is one of the most used formats. Developed by Apple it is a format that allows the users to overcome issues such as playback errors. The new version has also been launched which is known as QuickTime X.
The best part of this format is that it is available for Windows users as well. The files of the MOV format are usually of high quality. It is for the same that the size of such files is large as compared to other formats.
- Moving Pictures Expert Group 4, MP4
Introduced in 1998 it is a format that is used by the motion pictures association responsible for setting the standards. The format is widely used and is supported by various platforms as well as devices.
Even after the MP4 file is compressed it remains lossless and the quality remains the same. The HTML5 that has been launched currently also supports this format. It is compatible with almost all of the browsers that are on the market.
- 264
As the name suggests it is one of the best and the most used formats for HD videos. The compression remains lossless and even if the resolution is low the quality is maintained. The MP4 container is the one that is used to contain this format.
Most of the streaming devices, as well as the services, use this format while referring to HD video. The best part is that the format is widely accepted as industry standards for HD videos. Most of the users all over the world use this format to save their HD videos with ease.
- OGG
It is one of the most used video formats. It has been developed by the Xiph.org foundation to maintain the video as well as the audio quality on different platforms. The format is free and the documentation, as well as the configuration, can be downloaded by anyone.
- Advanced Systems Format, .ASF
If you want to stream videos then this is the format that is considered to be the best. It is still being used by the major popular streaming platforms of the world. The .ASF format is one of the best and it allows the users to overcome issues such as quality loss as well as streaming related issues.
You may also like: How to Post/Share a Video From YouTube on Instagram >>
Conclusion
If you require lossless compression then YouTube to WAV conversion is something that is required. Some many ways and means can be used to make sure that the idea is approached. The best way is to use Filmora as it is an easy and efficient operation.
The best way to get around the issue is to always use the service that is embedded with quality.
If you like this article then it is requested to comment and share it on social media. It will not only help others but will also let them have knowledgeable ideas.
Richard Bennett
Richard Bennett is a writer and a lover of all things video.
Follow @Richard Bennett
- Title: [New] In 2024, First Steps in YouTube Tech A Comprehensive List
- Author: Jeffrey
- Created at : 2024-08-20 14:48:17
- Updated at : 2024-08-21 14:48:17
- Link: https://eaxpv-info.techidaily.com/new-in-2024-first-steps-in-youtube-tech-a-comprehensive-list/
- License: This work is licensed under CC BY-NC-SA 4.0.