![[New] In 2024, Going Against Gravity Innovative Ways to Rewind YouTube Content](https://thmb.techidaily.com/93fd3ecf6c0ec1cdbec9f4930fda0699ca8c617492c26f7c6f508a444f408426.jpg)
"[New] In 2024, Going Against Gravity Innovative Ways to Rewind YouTube Content"
Going Against Gravity: Innovative Ways to Rewind YouTube Content
How to Reverse YouTube Video in Creative Ways

Richard Bennett
Mar 27, 2024• Proven solutions
It could be a film or a reversed meme, a boomerang video on Instagram, or a rewind effect in a playback action. The reversing results make the clip compelling and creative. At present, many video creators find YouTube as a suitable platform for such rewind effects as it has millions of diverse genre video clips. Although the mechanism behind such an act can be quite confusing, it is no more if you get to know how to reverse YouTube videos at ease. Yes, video reversers are created and developed for such a purpose, and you can read below to understand how to play YouTube videos backward.
- Part 1: How to Reverse YouTube Video in the Quickest Way?
- Part 2: Reverse YouTube Videos More Creatively

How to Reverse YouTube Video in the Quickest Way?
Let’s take a look at some online tools that can play YouTube videos backward.
2. Kapwing
Kapwing is an online video reverser shared stage where you can create images, videos, and GIFs to share on social media. It suits to be perfect for any content that performs varied tasks with video editor tools like trimmer, resizes, studio, subtitles, and audio addition. Kapwing is an all-in-one workspace asset that is a single secure place to place over your backup safely facilitated with cross-device capability. To whatever field of interest you might belong to from a school student, professional, media, or a design team, Kapwing is the right platform ease-to-use.
3. Clideo
Like Kapwing, Clideo is an online video reverser tool that does multiple tasking like video converter, file converter, audio joiner, video maker, and a slideshow maker. We have taken up Clideo in our list as it follows a simple interface and comes up with useful tools of the loop, stops motion, and meme required in the present video creation industry. Supporting all video formats like MPG, MOV, and VOB, Clideo is a fast editor with a high-level of data protection. Developed by Softo Ltd., Clideo has got more than 4.1M users and had made up 25M videos.
Now, let’s take a simple guide to reverse a YouTube video quickly with Clideo.
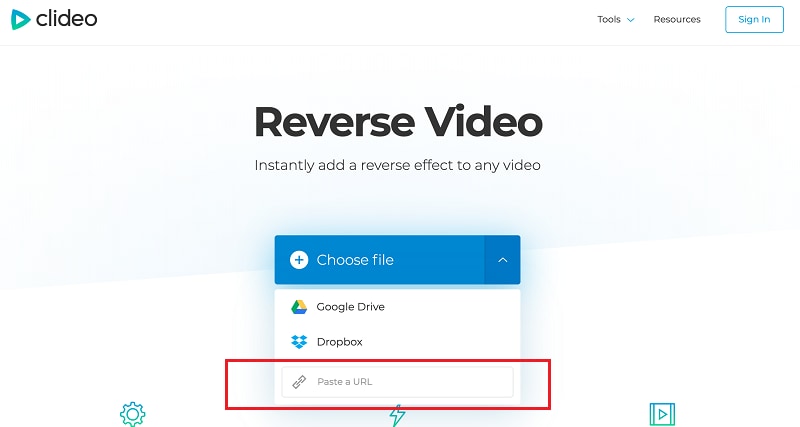
Step 1: Enter the link, https://clideo.com/reverse-video on your desired web browser like Chrome or Firefox.
Now add the files from your desktop or your smartphone from the “Choose File” option or the drop-down choose your convenient option like Dropbox, Google Drive, or YouTube URL to reverse the video.
Source: clideo.com
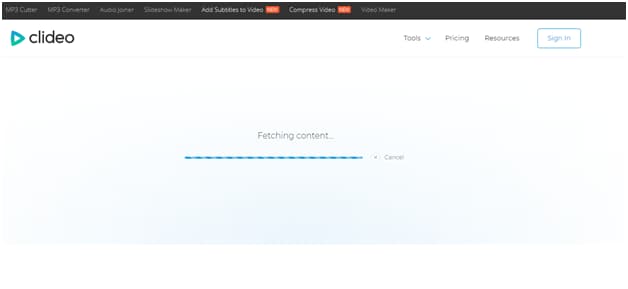
Step 2: Paste the YouTube link on the search box, and the video will process.
Step 3: The YouTube video will now start to play from backward where you can reverse the speed by changing the levels from 0.5X to 2X.
You can make a preview by playing or pausing the timeline of the YouTube video.
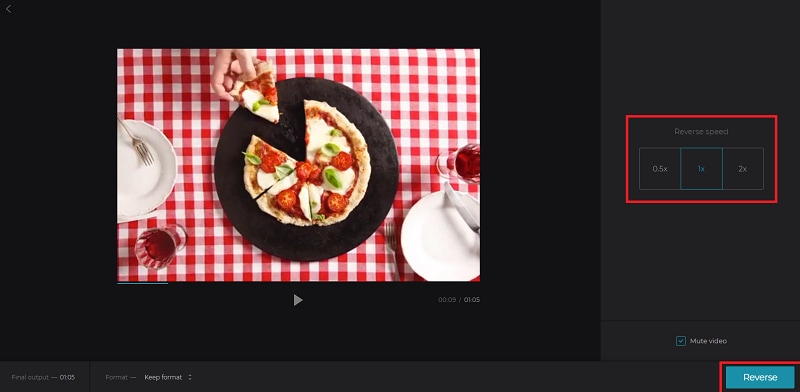Once satisfied, hit the “Reverse” button on the right corner of the screen.
Step 4: Before downloading the revered Youtube video, you can play it once, and upon satisfaction, tap the “Download” button else you can go on with the “Back to edit” option.
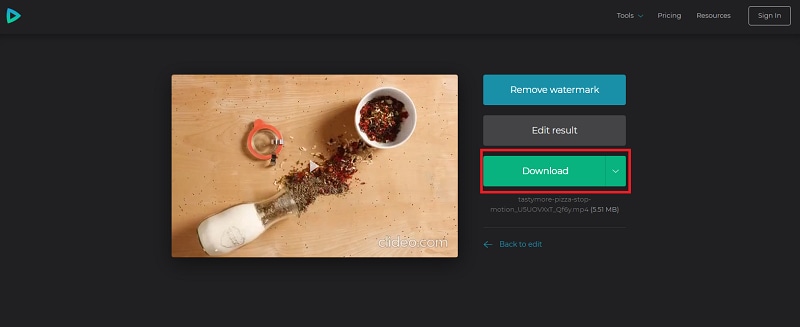
You can quickly reverse a YouTube video with Clideo in just three steps, along with a watermark removal facility.
Reverse YouTube Videos More Creatively
Want to embed more creativity in your YouTube video before reversing them? Get to know some of the YouTube video downloaders from this session.
Keepvid
Keepvid is an online video downloader that converts a video directly to MP4 & MP3. It allows you to download videos from 100+ sites, including YouTube, Facebook, Twitter, Vevo, Reddit, and BBC, irrespective of their video metadata. With Keepvid, you can listen to YouTube videos offline, save YouTube videos directly to MP3, download YouTube playlists everywhere, and anytime with the web-based lite-weight app.
YTD Video downloader
YTD video downloader has been in the market for years as a popular video downloader & converter. It is free to download software, allowing you to download video, audio, and playlist that could play offline. YTD video downloaded has gathered more than 200M users globally, supporting overall popular sites like Bing, Vimeo, TikTok, Yahoo, and Metacafe. With YTD, you can download the unlimited playlist and HD videos of 1080P at ultra-fast speed.
Want to reverse your YouTube video creatively and stunningly?
Wondershare Filmora is all you need, a complete pack of video/editing toolkit developed for the inspired that helps discover storytelling. It is a platform where you can create without limits, give life to your videos, craft fun in every clip, go beyond boundaries with endless possibilities, and make your epic story or adventure outstanding in the crowd. Filmora has a free version that allows you to access all the beautiful features like video reverse, ripple edit, trim, rotate, flip, zoom, edit, and audio ducking.
3.1How to Reverse Videos in Filmora?
Now that you have come to know about Filmora Wondershare, the best video reverser from the list, let’s directly jump over to a manual on how to reverse a YouTube video at ease.
Note: Before starting up, download and install the free version of Filmora on the device from https://filmora.wondershare.com/ .


Step 1: Open Filmora and click the “File” menu. Choose “New Project” from the drop-down.
Step 2: To import the YouTube video to the workplace, choose the “Import Media” option from the file menu.
From the drop-down, you can import files or folders at your convenience.
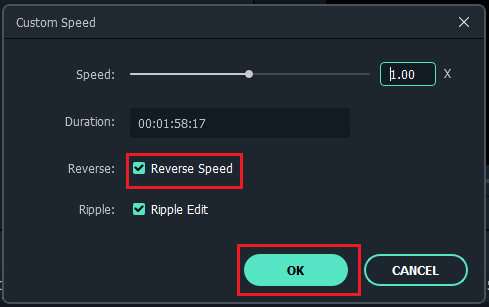
Step 3: Once the video is loaded on the media library, right-click on the track timeline and select the “Speed and Duration” option.
Tick the “Reverse Speed” checkbox and then hit the “OK” button.
Step 4: Doing so will play the YouTube video backward, and you can see the progress on the preview window.
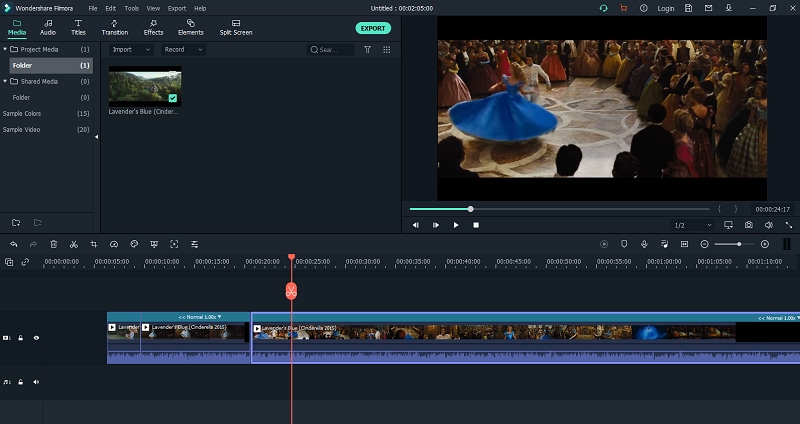
Step 5: You can perfect your creation with filters or effects offered with Filmora.
Once done, click the “Export” option that will allow you to save the file in your destined format and export it.
You can upload the reversed YouTube video directly to your YouTube account or other social media apps with Filmora.
3.2Tips for Customizing the Reversing Videos
1. Add filters & effects: Adding filters and effects like Mosaic and Amaro can uplift your reversed video and make them attractive. Filmora has 200+ filters, utilities, overlays, and LUT.
2. Render/Perfect the audio: Audio is the backbone of the video that provokes and makes the creation sound perfect and outstanding. 76 in-built audio tracks included in Filmora consisting of tender, sentimental, folk, rock, and young categories.
3. Transform your video with transitions: While various ordinary videos crowd the Internet, make yours unique by transforming them with 3D effects and a slideshow. Filmora comes with 233 transitions like 3D, warp, dissolve & ripple slideshow, lifestyle, and still a lot more.
4. Perform video editing tricks: While trim, cut & merge, crop & flip, resize, delete, and watermark are pre-defined and traditional editing tools, why don’t you try something new like creating freeze frames, accessing sample colors, and zoom in/out timeline where Filmora has a toolkit more than what you expect.
Conclusion
Thanks to the technology behind video reversers like Clideo and Kapwing that does a great job of reversing the YouTube video online quickly. The alternatives YTD downloader and Keepvid also facilitates downloading your favorite videos from 100+ video streaming sites. However, if you aspire to become a creative & professional video creator expert in the field, Filmora from Wondershare stands as the best choice for all. Lastly, also note the tips discussed, and use Filmora today for a brighter career tomorrow.

Richard Bennett
Richard Bennett is a writer and a lover of all things video.
Follow @Richard Bennett
The Creator’s Lab: Building an Unstoppable Channel
YouTube Creator Studio is a powerful tool for content creators. It allows you to manage and optimize YouTube channels for better performance. With YouTube studio monetization features, you can keep track of your revenues. The creator study also allows you to manage your videos and see how well they are performing. This article explores the monetization Youtube Studio in detail, including how to access and use it.
YouTube-Ready Video Editor A top choice for many creators looking to outperform their competitors on YouTube!
Free Download Free Download Learn More

Part 1. Introduction to YouTube Studio: Definition and Uses
Every creator is aware of YouTube Studio com monetization as a tool for managing YouTube. However, how much can you say about channel monetization YouTube Studio? Let’s have a look at what you need to know:
What is YouTube Studio?

YouTube Studio is a tool that allows creators and other users to manage their channels. Formerly known as YouTube Creator Studio, the tool helps you to edit and monitor the performance of your videos, You can also view and reply to comments, or even schedule content.
Uses of YouTube Studio
YouTube Studio is an essential tool for creators and brands. It helps them manage their presence on YouTube. Individuals can also grow their channels and track the progress they have made. Other people also use YouTube Studio as a hub to get a snapshot of their channel’s performance. It makes it easier to manage videos and offer opportunities for monetizing content through the YouTube Partner Program (YPP). The features that creators can access via the studio include:
- Manage the channel: YouTube Studio allows creators to customize their channel’s appearance, branding, description, and layout.
- Editing of videos: Options for editing videos in the Studio include details, end screens, thumbnails, uploading videos, subtitles, and adding or managing playlists.
- View your performance: Detailed insights are available about the performance of the videos, audience demographics, watch time, and more.
- YouTube Monetization: All the tools and settings for monetizing your videos and Shorts on YouTube are found on the Studio.
- Manage your comments: The comments section of the Studio allows you to view and reply to comments on your videos.
Part 2. Master Your YouTube Presence: Essential Steps to Dominate Creator Studio
Getting started with YouTube Creator Studio is simple. Log in to your YouTube, and click on the profile pic at the right corner of the page. Then select YouTube Studio from the dropdown menu.
Step-by-Step Guide for Using YouTube Creator Studio
Beginners may find it a bit tricky to navigate the YouTube Creator Studio. There are a lot of tools to explore, each with a unique function. Let’s break down the essentials to get you started.
- Step 1: Navigating the YouTube Studio
- Step 2: Exploring the Creator Dashboard
- Step 3: Manage Your Content
- Step 4: Monitoring Channel Performance
- Step 5: Review Your Studio Monetization Tab
Step 1: Navigating the YouTube Studio


To launch the YouTube Creator Studio, head over to studio.youtube.com and sign in. Then click on your profile pic and select YouTube Studio. On the left-hand side of the Studio screen, browse to navigate the features.
Step 2: Exploring the Creator Dashboard

The YouTube Creator Studio Dashboard provides all the handy information needed to create a growth strategy for your channel. You will see the analytics of your top videos and a summary of your views. You will also see your current subscribers watch time, and more:
- Review how your most recent video is performing
- Review personalized suggestions to grow your channel
- Check recent comments and respond appropriately
- Watch the latest updates from the YouTube team
- Look at important notifications to avoid copyright violations or monetization issues on time
- Explore the audio library to gain access to free soundtracks and music
Step 3: Manage Your Content

Click on the Content tab on the dashboard. Manage your content by editing or just reviewing the performance of each video. You can also create playlists linked to the videos to choose watch time.
Step 4: Monitoring Channel Performance

The YouTube Creator Studio Analytics provides a summary of your video metrics and reports. This will help you figure out what is working. The analytics also point out what needs to be improved to gain more views. Be sure to check views and watch time to get an accurate picture of the channel’s performance.
Step 5: Review Your Studio Monetization Tab


The monetization tab shows the monetization status of your channel. On the left side of the dashboard, click Earn to access this feature. After being accepted to the YPP, you can make money from advertising revenue, merch shelf, channel membership, and the fan-funded program. Before monetization, this page shows how far you are to meet the eligibility criteria.
Importance of Verifying the YouTube Channel
After uploading your videos to YouTube Creator Studio, you need to optimize each for monetization. This ensures that the algorithm works in your favor. It is also important to create an AdSense Account and link it to your channel. This will:
- Increase your level of credibility because a verified YouTube channel is seen as more trustworthy by viewers
- Protect you and your channel from impersonation by preventing other users from creating fake accounts under your name.
- Unlock additional features such as the ability to lie stream in HD and customer the channel layout.
Linking your AdSense to the Account is also a crucial step towards getting paid for your creation on YouTube. It ensures that your earnings get to you. After joining the YPP, you are allowed to change your linked AdSense account if you already have one. You can also monetize more than one channel using the same AdSense account, and keep track of your earnings.
Part 3. Create YouTube-Ready Videos with Wondershare Filmora
The success of your YouTube channel largely depends on the quality of the videos uploaded. You need video editing software that will make your creator studio attractive even before opening individual videos. Wondershare Filmora is a top choice for many creators looking to outperform their competitors on YouTube. Explore the range of possibilities with Filmora ranging from creative video effects to stunning text animations.
Free Download For Win 7 or later(64-bit)
Free Download For macOS 10.14 or later
Making YouTube-ready videos with Filmora is quick and easy. You need to have great footage to start with. Then, explore the editing features that will make the video stand out. Let’s have a look at the steps involved:
- Step 1: Launch Filmora
- Step 2: Create a New Project and Import Files
- Step 3: Organize Your Project Material
- Step 4: Place Files on the Timeline
- Step 5: Apply Visual Effects
- Step 6: Conduct the Color Correction Process
- Step 7: Export and Share
Step 1: Launch Filmora
Launch Filmora by double-clicking the desktop icon. On the welcome window, select the aspect ratio you want to use.

Step 2: Create a New Project and Import Files
After launching Filmora, click New Project on the welcome screen. Once the editor loads, import the media files from the options provided.

Step 3: Organize Your Project Material
Manage the files you will be using in the editing project. The My Album option allows you to organize the file using different criteria such as type or purpose.


Step 4: Place Files on the Timeline
Time to start editing your video. Place the video and audio files on the timeline while removing the redundant parts. Use the drag-and-drop feature to edit the clips, one at a time, cutting out unneeded footage to have a clear story.

Step 5: Apply Visual Effects
After removing the unwanted parts from the video clips, detach the audio and video files. Insert transitions between clips, add music, and use other visual effects on Filmora to make the video more exciting.

Step 6: Conduct the Color Correction Process
The effects icon gives you access to filters and overlays to make your video colors more vivid. Select the filters of choice, and drag and drop it to where you want to use on the timeline.

Step 7: Export and Share
Once you are satisfied with the video outcome, export it in MP4 format, ready for upload on YouTube. Save it in your local drive, and upload it to YouTube via the Creator Studio.

Conclusion
The YouTube Creator Studio allows you to manage your channel and content in a central location. You get access to all the essential features, including analytics and content editing. Also, manage the monetization of your videos and reply to comments. Good video editing software will play a crucial role in building your channel. We recommend exploring video editing features on Wondershare Filmora to make better videos for your channels. With most tasks now optimized, editing videos with Filmora is now easier and fun.
Free Download Free Download Learn More
- Title: [New] In 2024, Going Against Gravity Innovative Ways to Rewind YouTube Content
- Author: Jeffrey
- Created at : 2024-08-20 15:42:44
- Updated at : 2024-08-21 15:42:44
- Link: https://eaxpv-info.techidaily.com/new-in-2024-going-against-gravity-innovative-ways-to-rewind-youtube-content/
- License: This work is licensed under CC BY-NC-SA 4.0.