Resolve 'Camera Not Found' Issue in Windows 11: 7 Essential Fixes
Resolve ‘Camera Not Found’ Issue in Windows 11: 7 Essential Fixes
Quick Links
- Restart Your Computer
- Ensure the Camera Is Connected Properly
- Ensure the Camera Is Enabled In the Device Manager
- Use the Camera Troubleshooter
- Repair or Reset the Camera App
- Check Your Antivirus Settings
- Update the Camera Driver
Key Takeaways
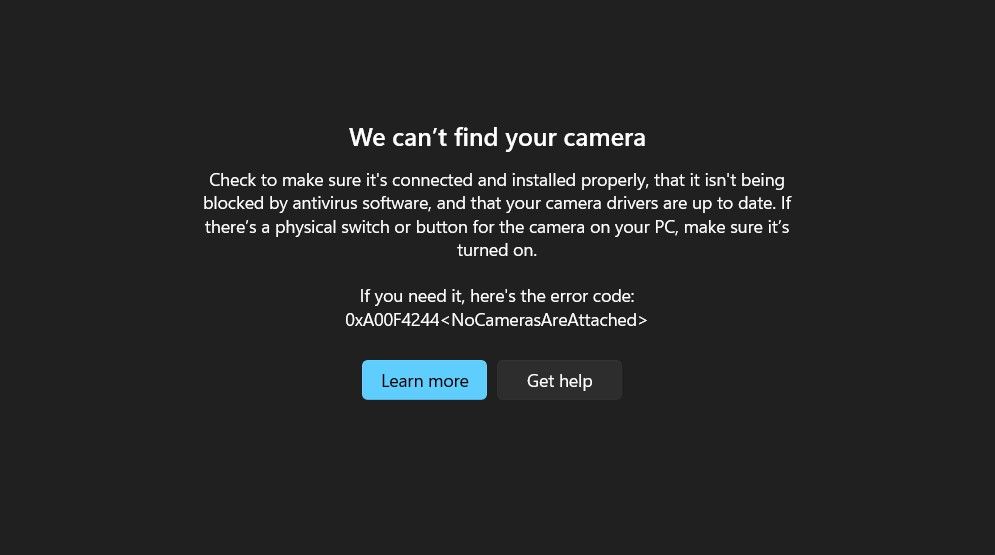
- If you encounter the “We can’t find your camera” error when launching the Windows Camera app, try restarting your computer to fix the issue.
- You should also carefully inspect the camera’s connection to your computer’s USB port. Ensure that the cable is in good condition and securely seated in the port. Additionally, try connecting the camera to a different USB port to rule out any issues with the current port.
- If the error remains unresolved, try advanced fixes like ensuring the camera is enabled, updating the camera driver, using the camera troubleshooter, checking your antivirus settings, and using the Windows repair and reset feature.
Are you getting the “We can’t find your camera” error upon launching the Windows Camera app? This error, accompanied by the 0xA00F4244
1. Restart Your Computer
If you encounter the “We can’t find your camera” error, your first step should be to restart your computer . This is because a temporary glitch in the Windows Camera app can sometimes cause the error message.
Restarting your computer will reload all the running processes and usually eliminates any bugs or glitches that might be causing problems, including the camera error.
To restart your Windows PC, press the Alt+F4 keys together to open the “Shut Down Windows” dialog box. Then, select “Restart” from the drop-down menu and click “OK.”

After your computer restarts, open the Camera app and check if the error message still appears. If it does, continue with the next troubleshooting method.
2. Ensure the Camera Is Connected Properly
If you’re using an external webcam , ensure it’s properly connected to your computer. Inspect both ends of the cable for any loose connections and verify that the connecting cable is in good condition.
If everything appears to be in order, unplug your camera from the port it’s currently connected to and plug it into a different port. If the camera starts working, it indicates an issue with the original port. In this case, you should take your device to a technician for port repair.
3. Ensure the Camera Is Enabled In the Device Manager
Windows allows you to enable or disable your camera manually. Consequently, when you attempt to launch the Camera app with your device camera disabled, you will encounter the error message “We Can’t Find your Camera.”
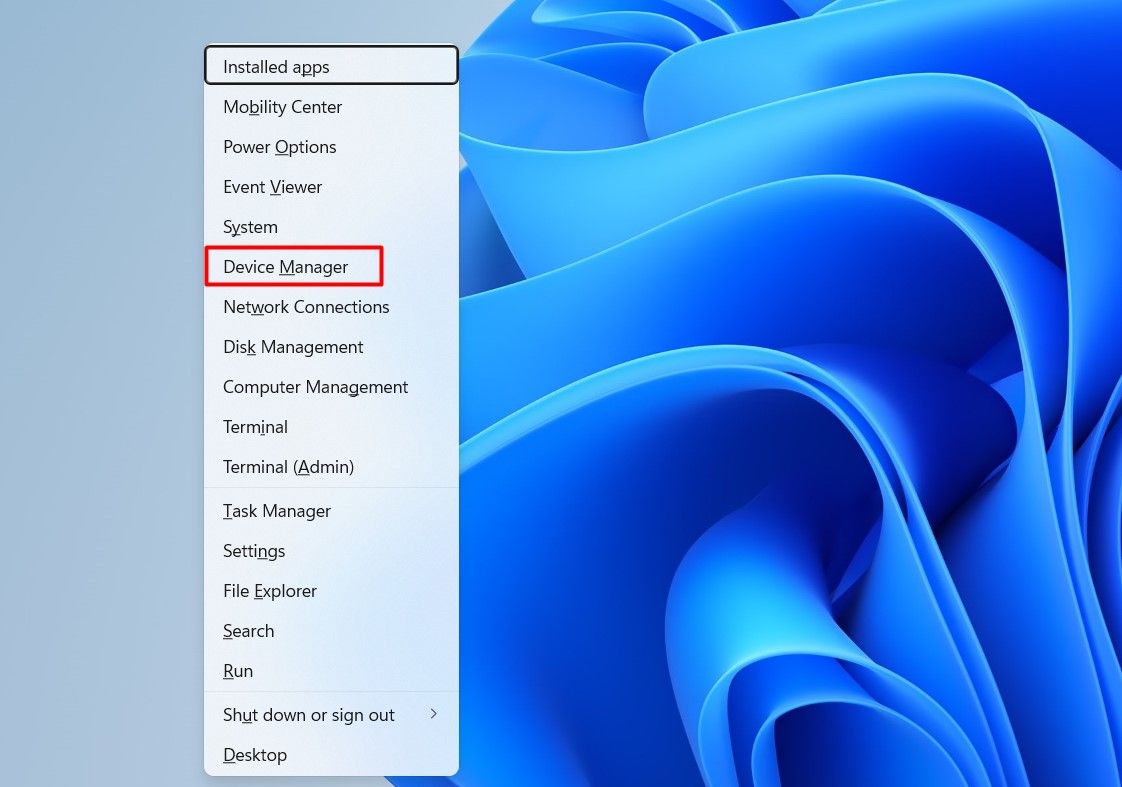
In this case, verify that your camera is not disabled. To check that, press the Windows+X keys together and select “Device Manager” from the context menu.
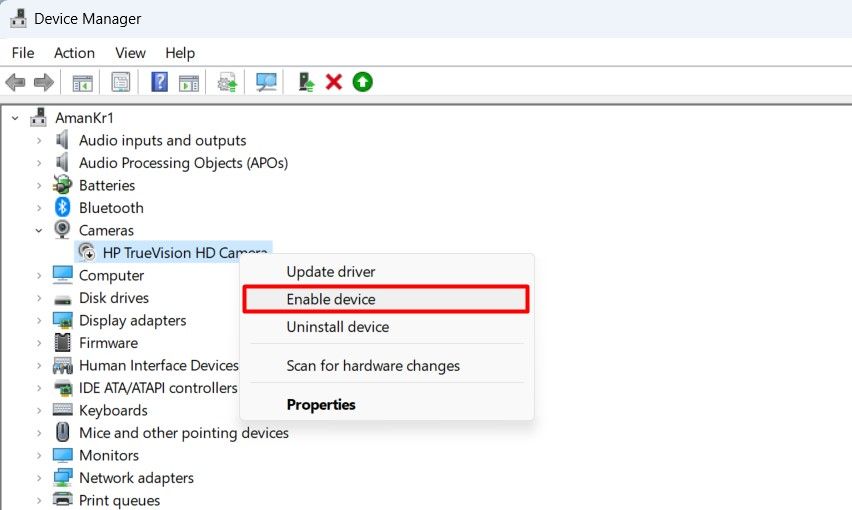
Within Device Manager , expand the “Cameras” category.
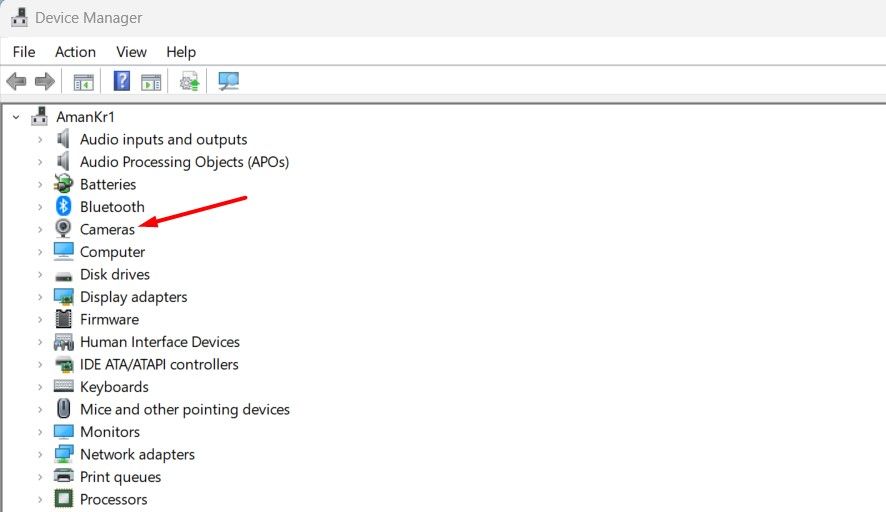
Next, right-click on your camera and check the context menu that appears. If the option to “Enable Device” is available, it indicates that your camera is disabled. To activate the camera, select the “Enable Device” option.
Now, close the Device Manager and check for the issue.
4. Use the Camera Troubleshooter
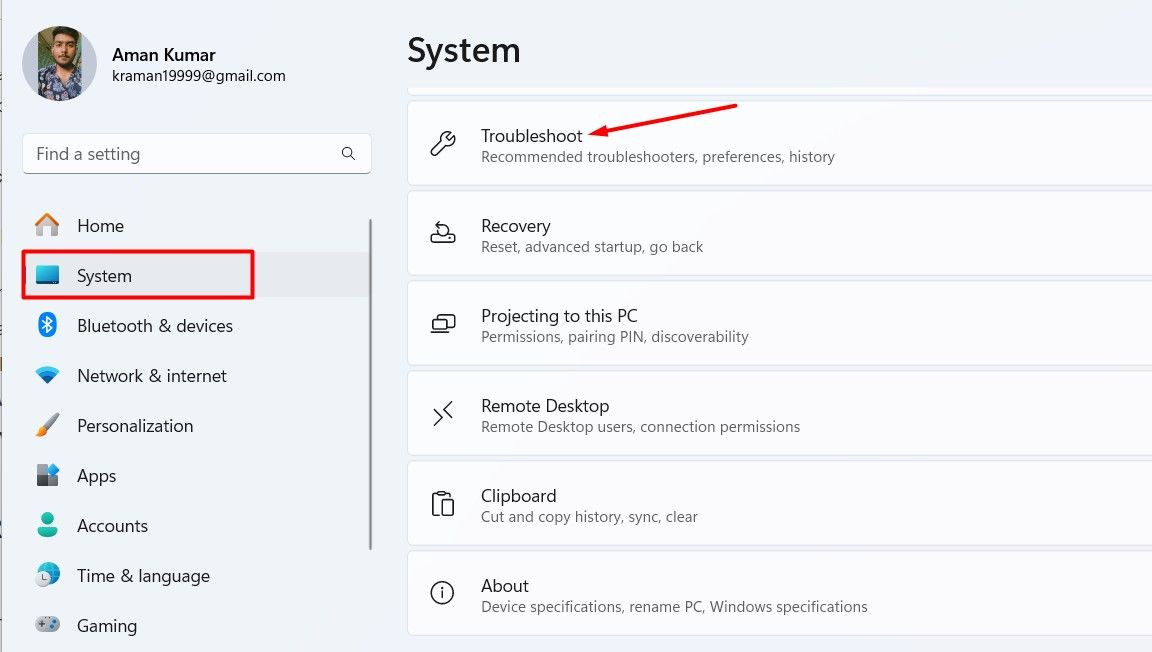
The Windows Camera Troubleshooter is a helpful utility that can resolve most camera-related issues, including the one you’re encountering. To use this utility, open the “Settings” app (check out different ways to access the Settings app on Windows ), choose “System” from the left sidebar and “Troubleshoot” from the right pane.
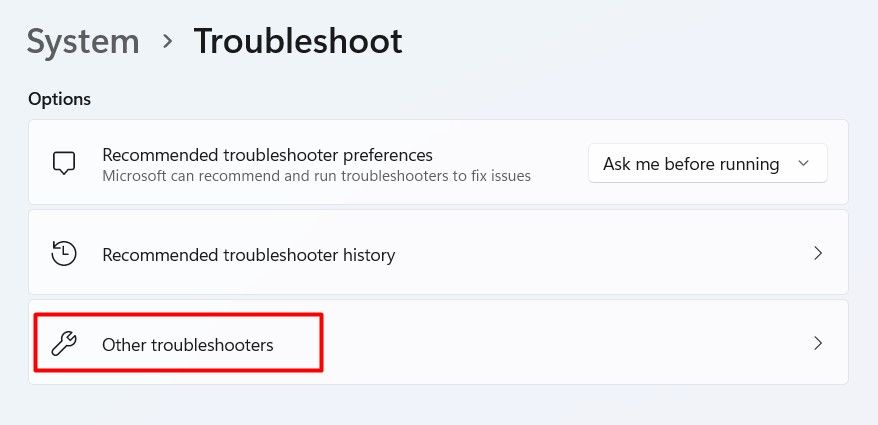
Click “Other Troubleshooters.”
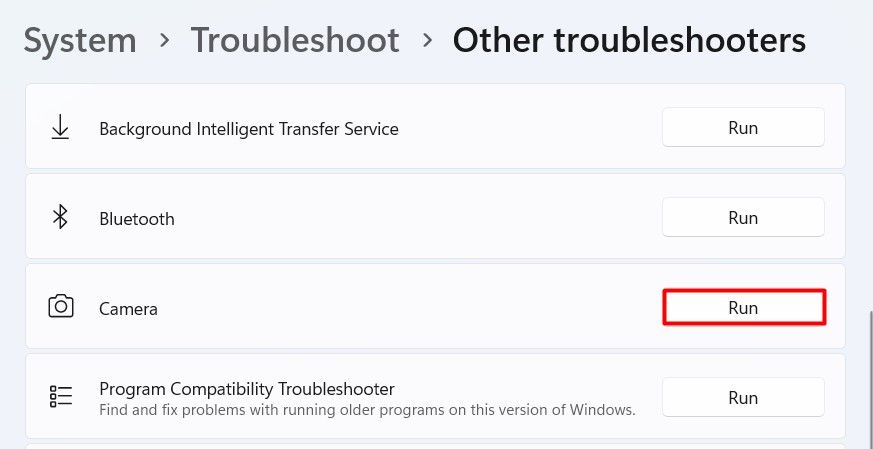
Click “Run” next to the Camera option.
A Get Help window will appear. Click “Yes” to grant permission for automated diagnostics to be run.
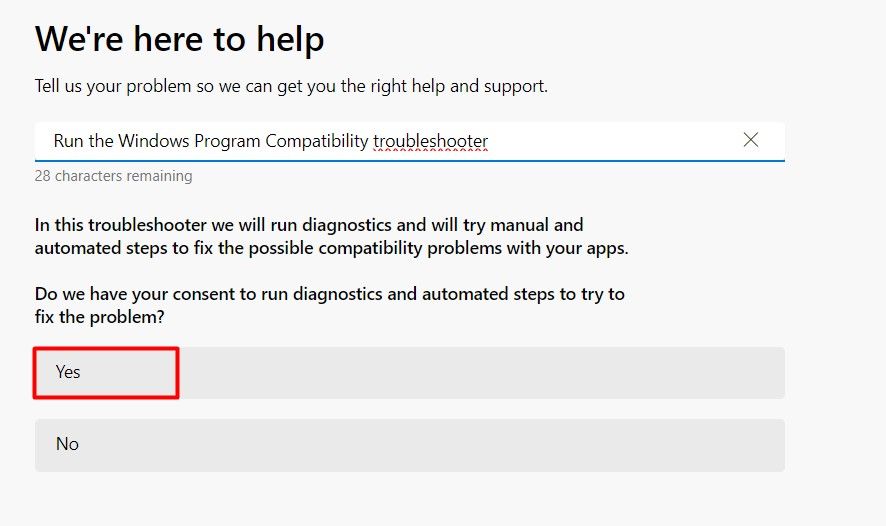
The Get Help window will proceed to perform necessary fixes. Once completed, restart your device and check if the issue persists. If it does, consider using the Windows built-in repair and reset feature.
5. Repair or Reset the Camera App
The repair and reset feature is a troubleshooting tool that allows you to address issues with UWP (Universal Windows Platform) apps that are not functioning properly. The repair feature clears the app’s cache data, while the reset feature deletes the app’s entire data to resolve the issue.
You should always prioritize the repair option first, as it attempts to rectify the issue without deleting the app’s data. However, if repairing the app doesn’t resolve the problem, you can proceed with the reset option.
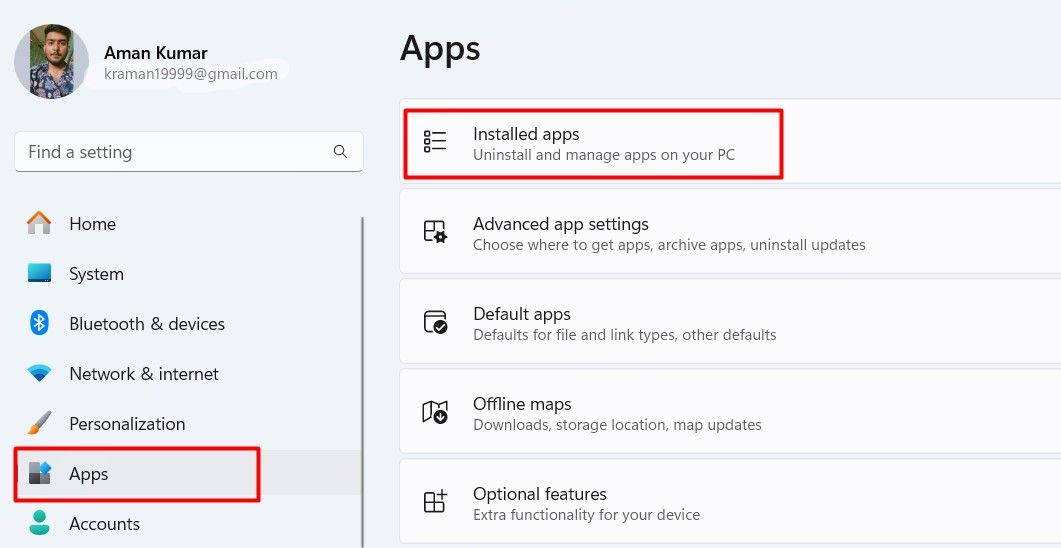
To repair the Camera app, open the Settings menu, click “Apps”, and then click the “Installed Apps” option in the right pane.
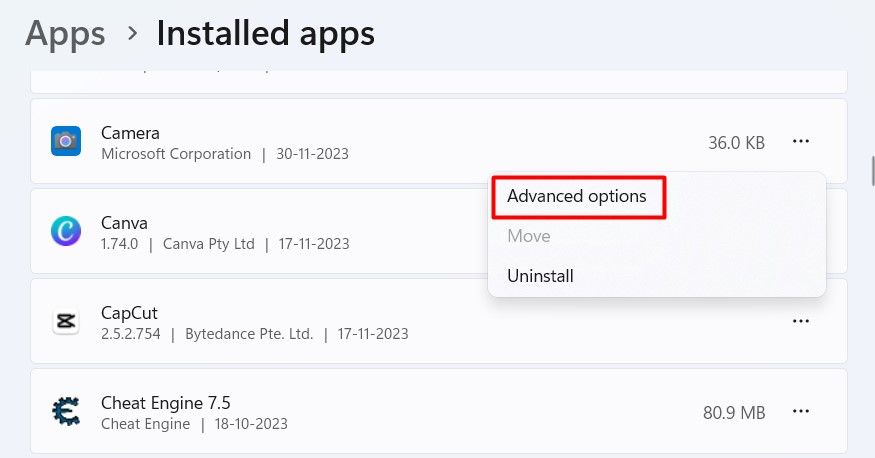
Click the three dots next to the “Camera” app and choose “Advanced Options” from the menu that appears.
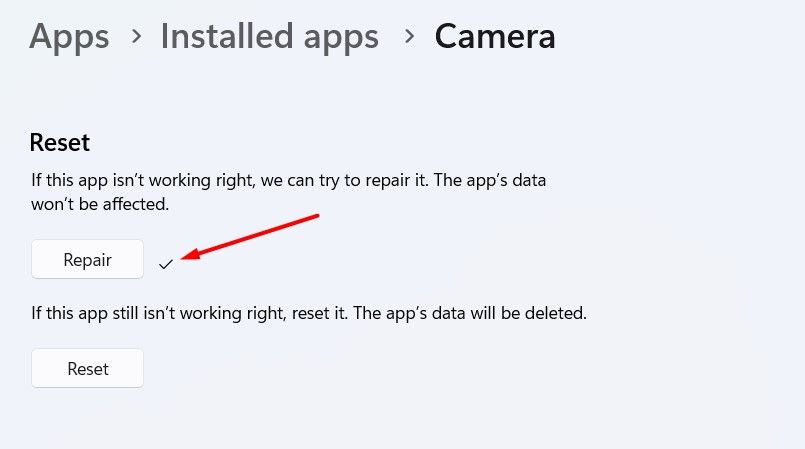
Click the “Repair” button.
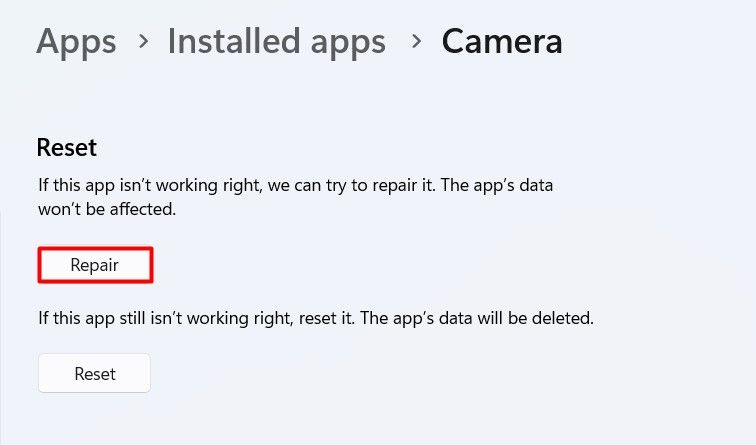
Windows will attempt to repair the app. Once the repair process is complete, a checkmark will appear next to the Repair button. Subsequently, launch the Camera app and check if it’s functioning correctly. If you’re still encountering the error message, you’ll need to reset the Camera app.
To reset the Camera app, click the “Reset” option.
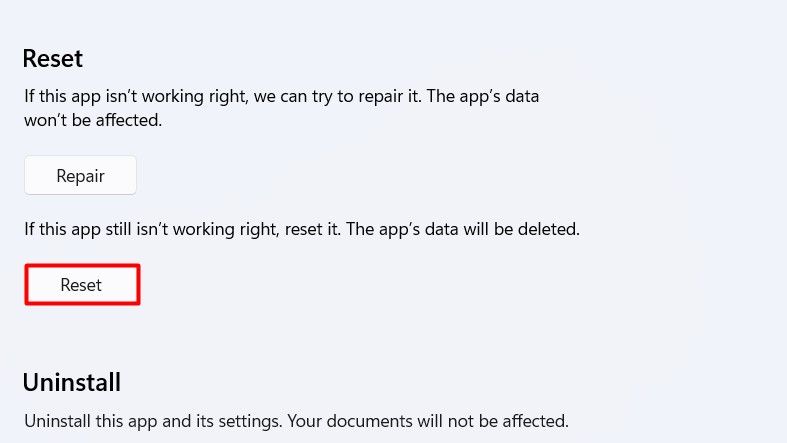
Windows will reset the Camera app. Once the reset process is complete, another checkmark will appear next to the Reset button. After that, launch the Camera app, and the issue should be resolved.
6. Check Your Antivirus Settings
If you have a third-party antivirus program installed on your computer, ensure your Camera app is not included in its blocked list. If it is, you may encounter the “We can’t find your camera” error when opening the Camera app.
The steps to check the blocked apps list vary depending on the antivirus program. So, check your antivirus program’s user manual to learn how to block or unblock an app in it.
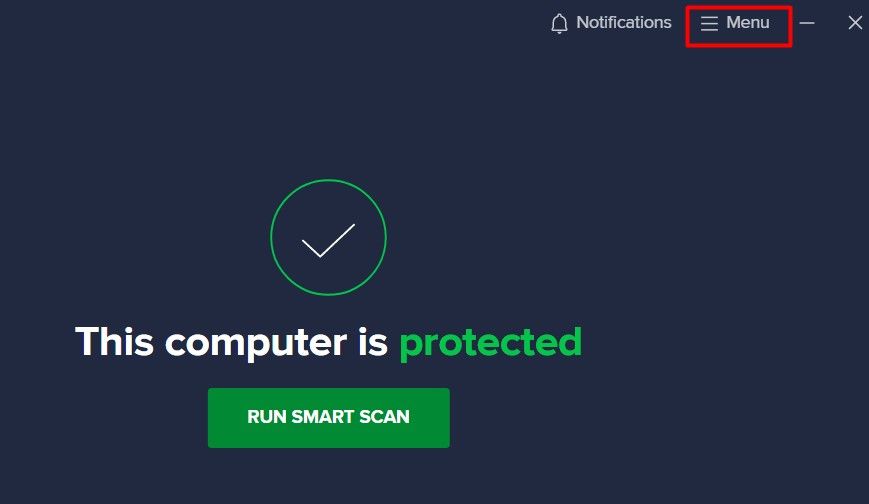
If you have Avast antivirus installed, you can remove the Camera app from its blocked list by opening Avast Antivirus and clicking the “Menu” option in the top bar.
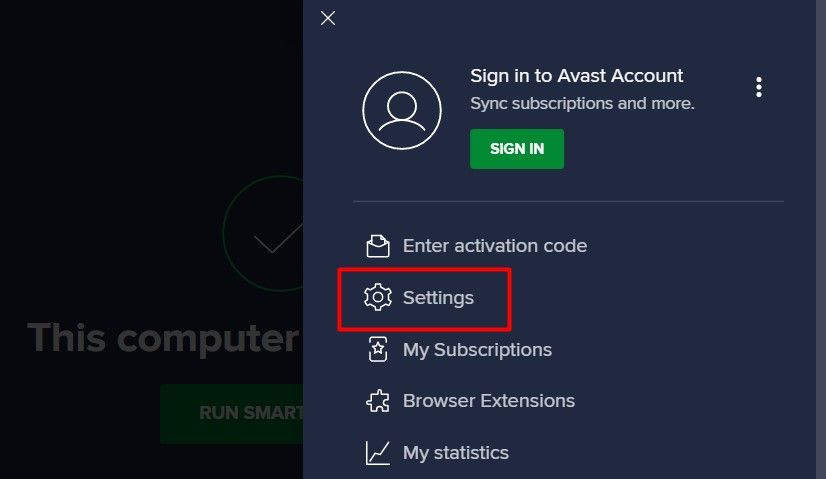
Then, choose “Settings” from the menu that appears.
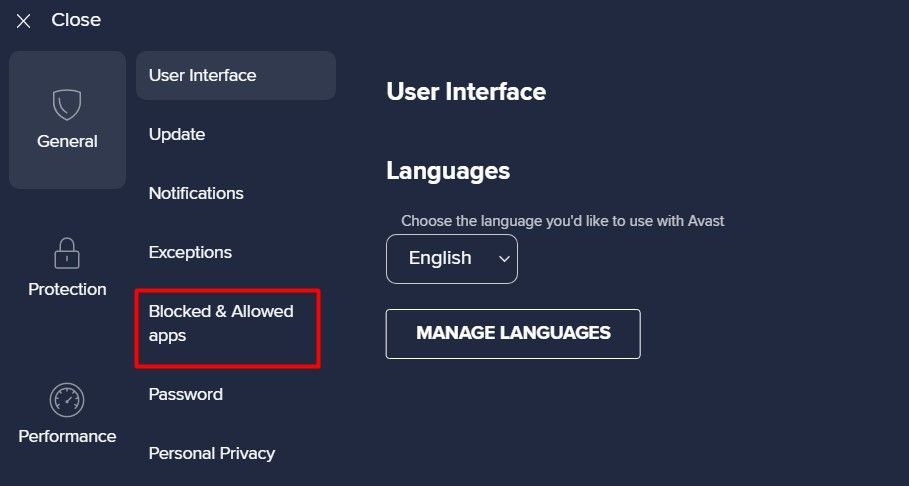
Click the “Blocked & Allowed Apps” option in the left sidebar.
Check if the Windows Camera app is in the blocked app list. If it is, click the three dots next to the app and choose the “Remove” option.
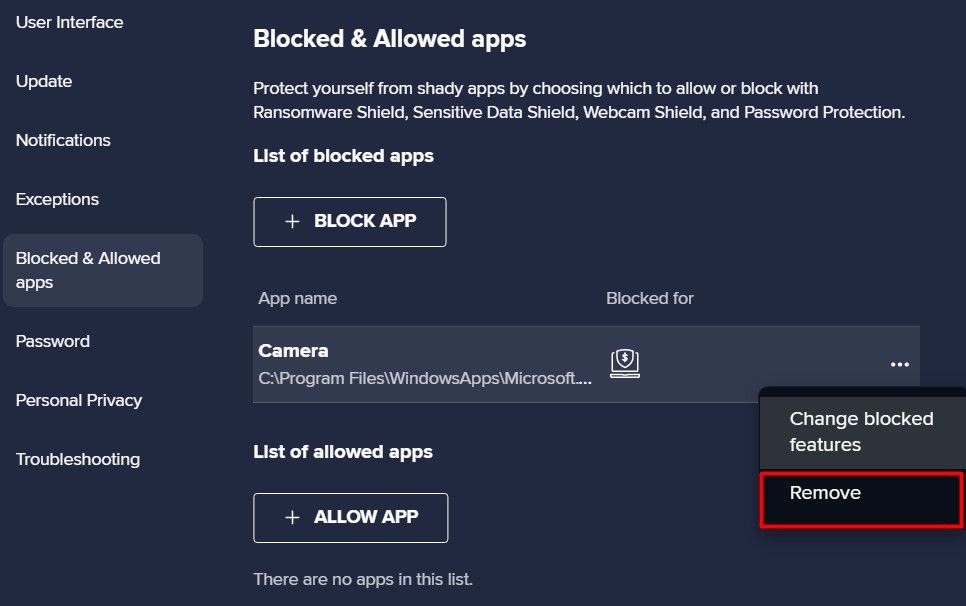
After that, close the antivirus program. You should now be able to use the Camera app.
7. Update the Camera Driver
If you’re still encountering the issue, you should check for and download any available camera driver updates. Camera issues often arise from outdated drivers. In such cases, updating the camera driver to its latest version is the most effective solution.
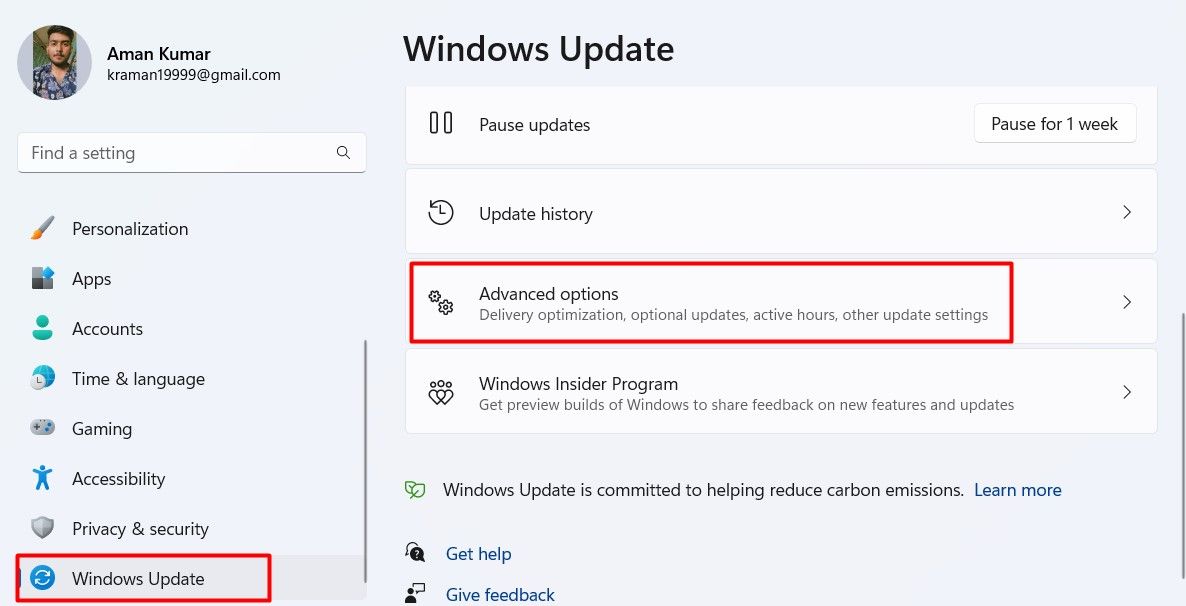
To update the camera driver, open the “Settings” app, click on “Windows Update”, and select “Advanced Options” in the right pane.
Under “Additional Options,” click on “Optional Updates.”

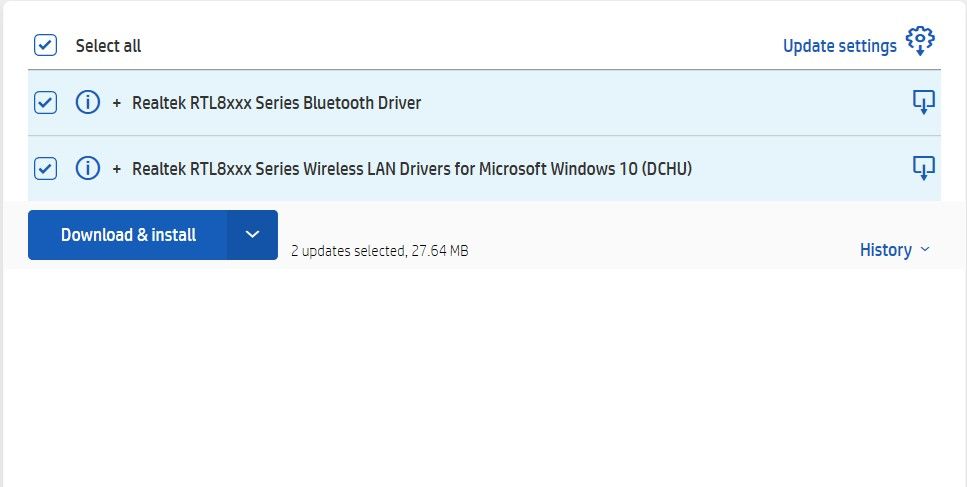
Expand the “Driver Updates” section and check for any available updates for your camera. The camera update will have the name of the camera installed on your device. For example, if you have an HP True Vision camera installed, the update name will likely be “HP-Camera,” followed by the update version.
Select the checkbox next to the camera update and click the “Download & Install” button to download and install the update.
If the optional updates section doesn’t show any available driver updates for your camera, you can visit your computer manufacturer’s website and download any available updates for your camera driver.
Hopefully, the solutions provided above have helped you resolve the error, and you can now use the camera app without any issues. If it didn’t, you should try your camera on another PC. If the camera doesn’t work on a different PC either, the problem is likely with the camera itself. It may be broken, and if it is, you’ll likely have to replace it.
Also read:
- [New] 2024 Approved 11 Popular Video Extractors Online
- [New] Building a Sustainable Income via YouTube and AdSense for 2024
- [New] Deception's Toll Consequences of Fake Supporters in Video Markets for 2024
- [New] Essential Guide to Mastering ASMR Experience for 2024
- [New] Shortcuts to Success How to Skip Edgenuity Online Lessons Gracefully for 2024
- [New] Warmth in Visuals Ideal Winter Backgrounds for YouTube
- [Updated] 2024 Approved Best Extensions to Capture Firefox
- [Updated] Innovative Tech for Live Video Recording – Webcam with VLC for 2024
- [Updated] The Route to Revenue Crafting Content Around Consumer Commodities
- [Updated] Zeroing In on Your Ideal YouTube Subset
- 1. Effective Techniques for Reducing MP3 File Size and Saving Disk Space
- Effortless Guide: Creating a Musical Photo Slideshow for YouTube Success
- Federal Tech Innovations: Automating Government with Intelligence - Official Podcast
- Massive Downsizing at Intel: Over 15,000 Job Cuts Linked to Meteor Lake Issues; Company Halts Dividends Amid Crisis
- The Ultimate Guide to 8 Mirrorless Cameras for Vloggers for 2024
- Troubleshooting Tips for Hidden Event Entries in iPhone's Schedule
- Unveiling the Potential of the Nokia 3.1 for First-Time Users - Reviews & Insights
- Title: Resolve 'Camera Not Found' Issue in Windows 11: 7 Essential Fixes
- Author: Jeffrey
- Created at : 2024-11-23 18:11:28
- Updated at : 2024-11-28 18:04:46
- Link: https://eaxpv-info.techidaily.com/resolve-camera-not-found-issue-in-windows-11-7-essential-fixes/
- License: This work is licensed under CC BY-NC-SA 4.0.