![[Updated] In 2024, From First to Last Your Guide to YouTube Video Looping 101](https://www.lifewire.com/thmb/IVUFCsNZuNwq-xRb7upOLePnGRs=/400x300/filters:no_upscale():max_bytes(150000):strip_icc()/GettyImages-535072327-57b25f5d3df78cd39c8469c6.jpg)
"[Updated] In 2024, From First to Last Your Guide to YouTube Video Looping 101"
From First to Last: Your Guide to YouTube Video Looping 101
How to Loop a YouTube Video: The Ultimate Guide 2024

Shanoon Cox
Mar 27, 2024• Proven solutions
You must have watched a thrilling YouTube video and repeated it several times. The challenge to most of us is how to loop a YouTube video automatically while at the comfort of our seats.
This guide will show you three methods on how to put a YouTube video on loop easily on your laptop, iPhone or desktop. And how to loop a video differs from one device to another. Moreover, there are many different types you play over and over again; a favorite sermon, yoga tutorials, a motivational speech, and the list is endless.
In the last sections of this article, I’ll introduce you to the best YouTube video loopers that will keep replaying videos infinitely.
To keep playing your YouTube videos on loop in a very simple way, just keep reading:
How to Loop YouTube Video: for Both Computer and Phone
- Option 1: Using the YouTube in-built loop technique
- Option 2: Using playlist to set video loop
- Option 3: Editing URL
- Option 4: Using Looping sites
- Option 5: Using Looping Apps
- Option 6: Using Google Chrome extension

How to Loop YouTube Video: for Both Computer and Phone
Every human being has his/her most favorite types of videos. What’s yours? To date, how many times have replayed them? Majority of internet users have access to both smartphones and computers. So, are there YouTube video looping techniques applicable to both computers and phones?
The answer is, Yes.
Stop using the reverse button to replay your videos on YouTube and use the options below.
Read More to Get : How to Download YouTube Videos without Any Software Easily >>
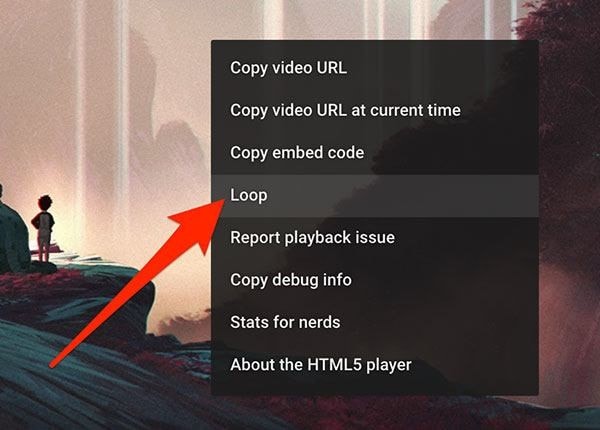
Option 1: Using the YouTube in-built loop technique: right-click technique
This is the easiest and most used technique to create YouTube video loops.
For Computer Users:
Step 1: Open the YouTube app on your computer or laptop and select the video to replay in a loop. Click to start enjoying your video.
Step 2: While the video is on the play, right-click the video and a prompt action suggestion box will pop up. Click the “loop” option and the playing video will be replay.
Step 3: To remove the YouTube embedded autoplay loop, click the loop option and you are done.
For Phone Users:
To loop YouTube videos using the In-built loop technique on iPhone, the procedure isn’t much different from that of a computer. Here are the steps;
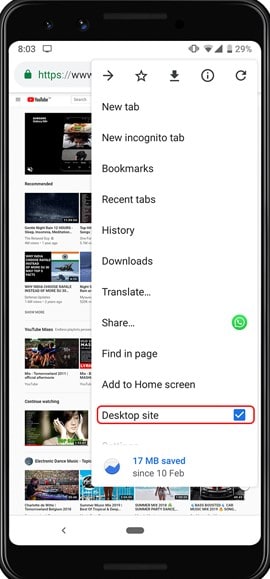
Step 1: Open YouTube videos using m.youtube.com on your phone. Using m.youtube.com prevents opening the video directly from the YouTube app.
Step 2: Browse the video you would like to set loops. Got it? Now start playing the YouTube video.
Step 3: At the top right corner of the video are 3 dots menu. Click the dots and scroll down to the “desktop site” option and select it.
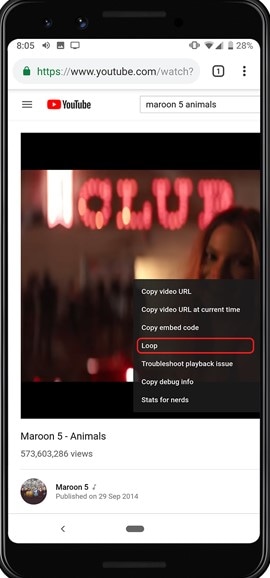
Step 4: While on the mobile browser version, long-press the playing video to open the video menu. Click the “loop” option. Now your Youtube replay loop is set.
Option 2: Using playlist to set video loop
To play two YouTube videos at once, this is the method to use. Before you can begin the process of setting videos on repeat, you have to sign in first.
Step 1: Select the videos to play on repeat.
Step 2: Sign in to your YouTube.
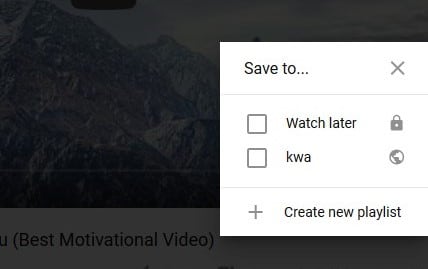
Step 3: After signing in to YouTube, click the “**+**” icon at the bottom of the video. Select the “create new playlist” to add the chosen videos. Name your playlist and choose to view public or private.
Step 4: Back to the main YouTube app; click the shown three bars and a long list of options pop up.
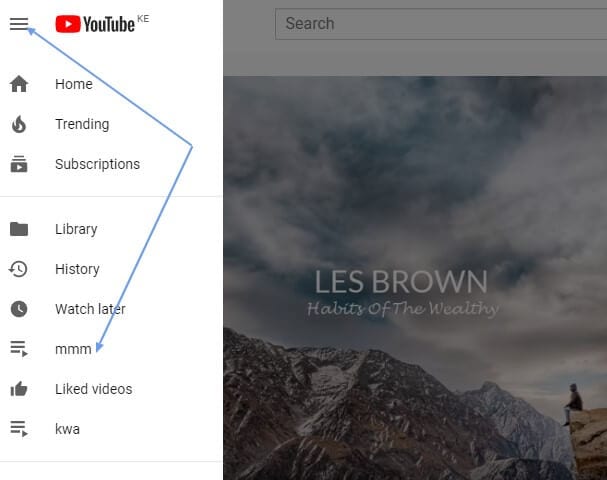Step 5: Select the playlist “mmm” and then click “play all”.

Option 3: Editing URL
This is among the least known method of creating a video loop. It involves editing the video URL of YouTube to replay. URL is usually divided in to different sections. This is the simplest option as involves only deleting the hypertext transfer protocol (https) and the World Wide Web (www) and inserting the word “repeat” immediately after “Youtube”.
This is how to do it:
Step 1: Search for the video to set on replay.
In our case, let’s choose - https://www.youtube.com/watch?v=xo1VInw-SKc
Step 2: Delete the first part “**https://www.**” in the address bar.
The remaining sections will be- youtube.com/watch?v=xo1VInw-SKc
Step 3: After “Youtube” and before “.com” write “repeat”.
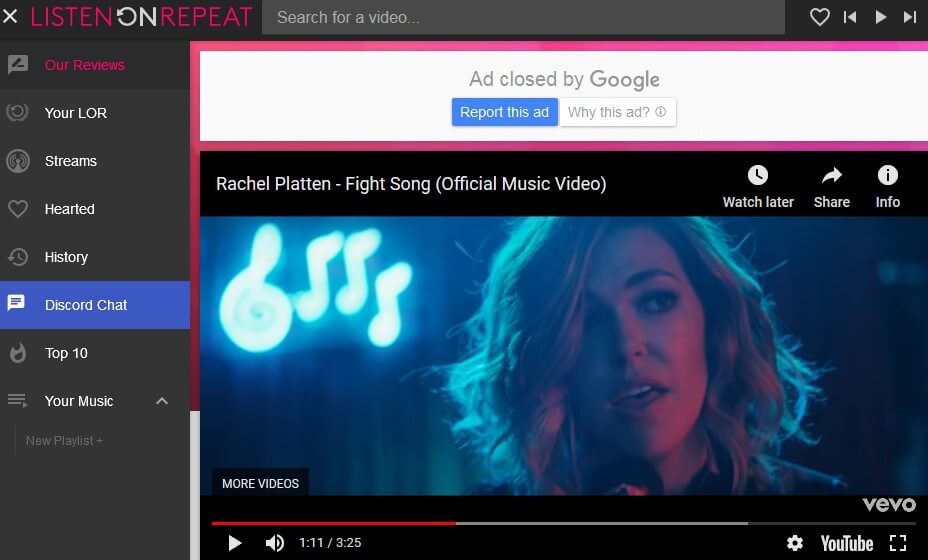
So it looks like this “youtuberepeat.com/watch/?v=xo1VInw-SKc” in your address bar.
Step 4: Click to play and your video will start playing in a loop in the ListenOnRepeat app.
2. Loop YouTube video with Youtubeloop.net
Step 1: Click to open any of the above looping sites .i.e. Youtubeloop.net
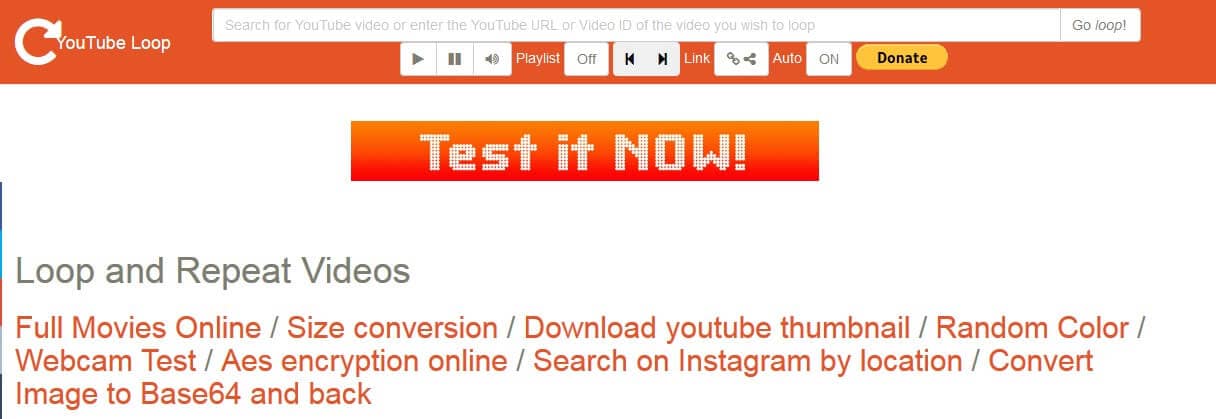
Step 2: Search for the video to set on loop.
Step 3: Copy- paste the video URL to the top blank space of the site.
Step 4: Click “_Go loop_” at the top right and the video is ready to play in a loop.
How To Loop YouTube Videos On Phone
The most suitable method you can use to set YouTube replay loop is by downloading video looper apps. There a lot of video looping apps for android and smartphones in the market today.
Apps are developed to simplify how we do things and make them more fun. To use video loopers on phones, you only need to download and install it. Next is to search the video to loop and with the slider, loop part of YouTube video that most fascinates you.
Whether you want to play a video on loop on an android phone, iPhone, iOS or tablet, there is mobile app compatible with your phone. This is how to loop your video on an android phone.
Option 5: Using Looping Apps To Set YouTube video loops
#App 1: Musepic
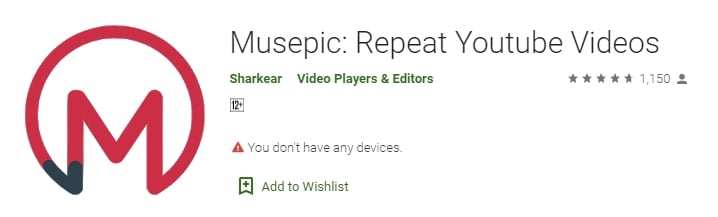
The Musepic looper app allows you to set video loops at any point within the play. Select the sections to loop and slide the loop button. You can now watch the YouTube embed autoplay loop for as long as you want.
In this case, we’ll use the Musepic app which is a third-party app available for download. It’s accessible via Google Play Store.
Step 1: Open your phones Google Play Store and search for the free version of the Musepic app. It has In-app purchases which you can use to add more features. Download and install.
Step 2: Click the first apps page option “Search-Find your videos” to select the video to set play on repeat. The best part of this app is the auto-suggestion of the videos you are likely to replay.
Step 3: Musepic app openly shows YouTube video looper controls. Click the selected video to start playing. Among the top, applicable features include loop button, sticky button and time slider.
#App 2: Repeat Player
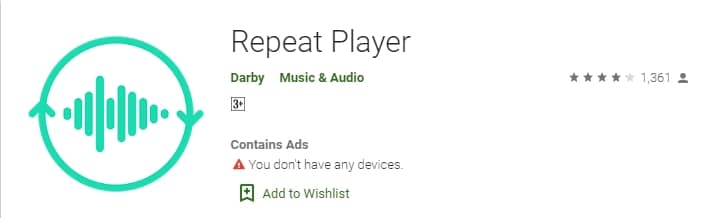
With Repeat Player installed on your phone, you can all 3gp, mp3, mp4 and xmf audios in loops the whole day. Its functions are oversimplified. Among the important features in this app include setting video loops in intervals, playback speed control and sleep timer control.
This app requires android 4.1 and up to function.
Just download the app and at the top 4bars, tap to select the video to loop. Use the two red slides to set the video repeat loop.
#App 3: Loop Player - A B Repeat Player
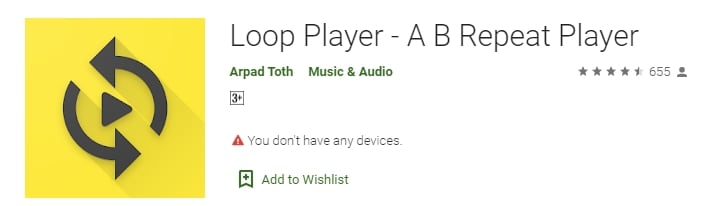
If you want to loop part of the YouTube video, Loop Player has two sliders to select the exact parts to repeat. It’s simple to use and is compatible with 4.2+ android phones.
To use this app, download and install it to your phone. Upload the video to loop and with slider A and B, set the video where to repeat.
Loop Player can be used to play background music, change playback speed and save an unlimited number of loops.
How to Loop YouTube Video: Only on PC
There is no much is required to set videos on repeat. The best and easy-to-use option is using Google Chrome Extensions. They are best suited for playing YouTube videos on loop online.
Option 6: Using Google Chrome extension
The number of free-to-use online Google Chrome extensions to set YouTube video loops continues to increase every day. To set YouTube repeat loops online, you just open the extension, copy video URL and you are ready to watch. One disadvantage of this option is you cannot set part of a video to replay on loop.
Here the top extensions;
#Extension 1: ListenOnRepea

This is the best app when you want to loop part of the YouTube video. Use the timing slider at the bottom of the video to select the part to loop.
ListenOnRepeat is available on Google Play and suitable for android 4.1+. If you are looking for music video loops app, this will never disappoint you. It’s simple and easy to use.
You can watch the top trending videos as suggested in its community section every day.
Only one thing will disappoint you; you can never multiple videos at once.
Step 1: Download ListenOnRepeat from Google Chrome extension.
Step 2: After you’ve downloaded and installed, search the video you want to watch repeatedly at the search bar at the top of the app.
Step 3: Click the selected video and it will be replayed continuously.
#Extension 2: Kapwing
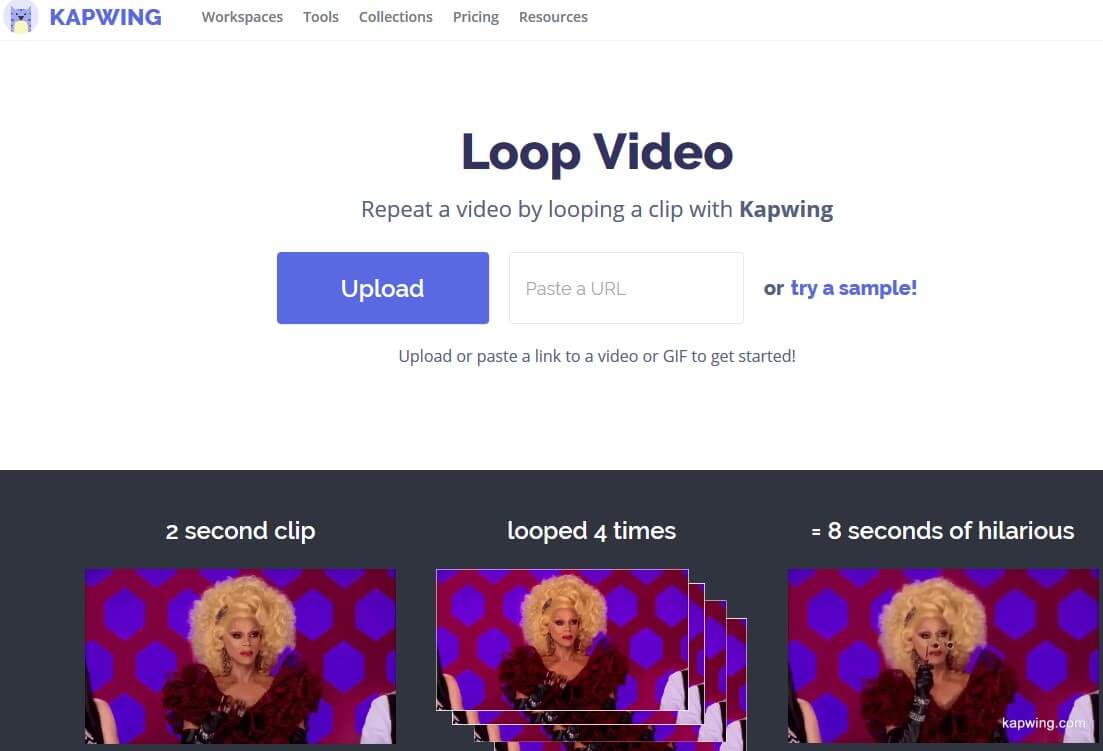
Kapwing is the extension to go for if you want to make YouTube videos longer, create a loop on your snaps and make a cinemagraph.
Some of the advanced features are on paid plans and just a few are available for free. You can trim and cut any unwanted parts of the video to replay. This extension allows you to set the number of loops to watch.
Like the other Google Chrome extension video lopper, open the extension, search for URL to watch on repeat and pest its URL and it will play on loop.
#Extension 3: InfiniteLooper
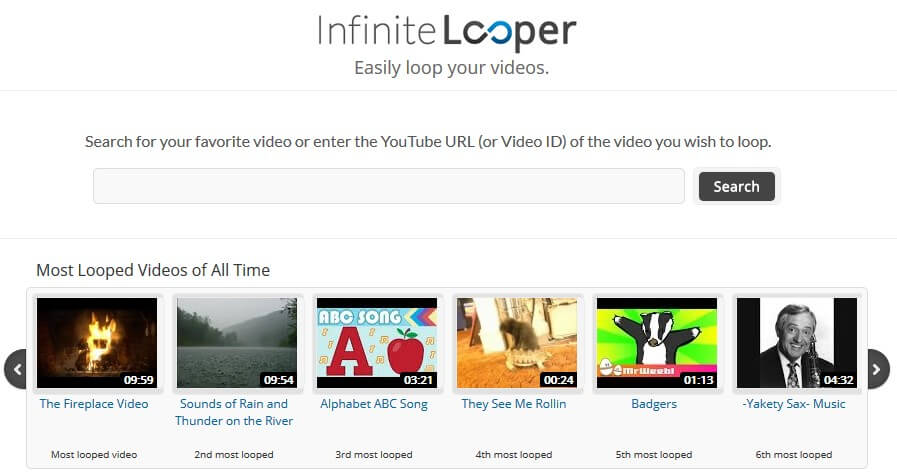
This app will make you glued to the computer with infinite loops on the best part of the YouTube video. Whether you want to watch the full video on repeat or a specific part, the infinite loop should be your choice.
However, this is not a to- go-for app if you intend to watch the video later without spending a single byte. To solve this problem, use a video downloader and with Filmora edit the video as much as you want then save it to your library.
It’s not common to be attracted to only one video. InfiniteLooper designers never thought of this. You have to use other technologies to play two YouTube videos at once.
Read More to Get : Best Video Websites Like YouTube >>
Screen Record Looping Videos With Filmora
But with Filmora Screen Recorder , you can watch as many videos as you want on Infinite Looper as you record them. Filmora is compatible with Win10, Win8, and Win7. You can buy this application or download it for free and upgrade it later.

Since InfiniteLooper allows only one video, use Filmora to record several videos, edit them and create up to 100 layers. This way, you’ll watch the 100 video loops in one video. Download and Try it Today!


Conclusion
Before you can decide to play a YouTube video repeatedly, there is a great reason. The fascination in it is so captivating that you require humble time as you watch it. A simple and seamless YouTube video looper best suits such videos.
Time to learn how to loop a YouTube video is of no essence during such moments. To disconnect your soul from that captivating video, try using video loopers that are complex and signing in to gain access to use is mandatory.
As new apps and features emerge every day, which is your best YouTube video looper and how do you put videos on repeat mode? You can leave a comment or suggestion below.
Shanoon Cox
Shanoon Cox is a writer and a lover of all things video.
Follow @Shanoon Cox
Precise Time-Stamping on YouTube: A Practical Approach
How to Add Timestamps on YouTube Video Link?

Richard Bennett
Mar 27, 2024• Proven solutions
It is a well-known fact that internet users have a short interest span, about just eight seconds. This attention span applies to all internet platforms including YouTube. YouTube is the second largest and most visited search engine after Google. It provides users with information through engaging and eye-catchy videos. However, certain videos are longer where only a particular section of the video holds the important information. Viewers tend to skip the long videos and if you do not want this to happen to you, you can link to that specific part on your video adding value for your channel viewers with a link known as the YouTube Timestamp link.
When you have a Timestamp link on your video, you can help your viewers directly reach the specific time in the video. This helps avoid the viewers from losing interest or to search for the key part in your video themselves.
Here in this article, we will explain Timestamp links, how to add Timestamp to YouTube video links, and what are the benefits of Timestamp.
- Part 1: YouTube Timestamp Links Introduction
- Part 2: Adding a Timestamp to YouTube Video Link on Desktop
- Part 3: How to Share Specific Parts of YouTube Video
- part 4: Getting YouTube Timestamp Link on Mobile
- Part 5: FAQ About YouTube Timestamps
Part 1: What is YouTube Timestamp Links
In this fast-paced world where viewers have limited time at hand, YouTube Timestamp links are extremely helpful. These links are anchor text or video hyperlinks found either in the description beneath the video or at the video link end.

The Timestamps links allow you to put a link to a key moment in your YouTube video allowing the viewers and subscribers to view the video at the precise time specified. Your YouTube video maybe half an hour long or maybe your users do not have the time now or forget to later watch your video, but when you add Timestamp to the YouTube link, you provide them ways to get to the content quickly enhancing the user experience.
In addition to this, you can even provide a reference in minutes and hours where necessary. The YouTube Timestamp link acts as a guide that directs viewers to the part of the video, which is most relevant to them without having to watch the entire video.
Part 2: How to Add a Timestamp to YouTube Video Link on Desktop?
In the following section, I will show you how to add timestamp to YouTube video link in several ways.
Use YouTube’s Share Feature
Using YouTube’s share feature is the simplest way to add Timestamp to YouTube videos. Here are easy steps to follow to do this.
- Open the YouTube video on your desktop that you want to share.
- Play the video or navigate the timeline and stop at the key moment you wish to apply the timestamp to.
- Now click on the Share button, a pop-up will appear. Under the URL, you will see a small box indicating Start at. The Timestamp is generated automatically, but you can adjust it.

- Copy the updated URL with Timestamp to share the video or click on the social sharing icons to do so.
- When your viewers click on this URL, the video will begin at the specified Timestamp.
Use the Browser URL to add Timestamp manually
You can add Timestamp manually as well. Follow the step-by-step guide below to add a Timestamp manually.
- Open your YouTube video in a browser on your desktop and then find the URL in the browser’s address bar.
- Enter the specific time you want the viewers to watch the video from at the end of the video URL.
You can add time manually in two ways depending on the URL.
?t=As or
&t=As
“youtu.be/” Format
If your YouTube video link is a youtu.be format, then just add ?t=As at the end of the video link. The A denotes the seconds at which you want the viewer to watch your video. The time can also be specified in minutes and seconds and when you want to do that just add ?t=AmBs. For instance, ?t=2m40s.
“youtube.com/” Format
When your YouTube video link has a youtube.com format, the adjustment starts with an ampersand. &t=As or &t=AmBs is what you can use. If you are looking to add the Timestamp at 2m40s, just add “&t=2m40s at the end of the video URL.
Whenever anybody uses the URL with Timestamp, the video will start from the specified time.
However, when adding a Timestamp manually, always leave include whole numbers. For example, if the time starts at 4m, use 4 and not 04.
Copy video URL at current time
You can use YouTube’s built-in feature to share the key parts of your YouTube video. Follow the steps here.
- Visit YouTube and open the video you want to add Timestamp link to.
- Play the video or navigate the timeline to reach the specific part you like to use in Timestamp.
- Now either press Ctrl + click or right-click anywhere on the video. A pop-up opens where you can see various texts, click on the Copy video URL at current time and share the link.

- Anyone who clicks on this link will be instantly transported to the exact segment of your YouTube video.

Part 3: How to Share Specific Parts of Videos with Vibby and Get YouTube Link with Timestamp
The above-mentioned methods to add and send YouTube link with timestamp are quick and easy, but they have a few limitations. If you need more control and share highlighted parts of YouTube video without cutting the video, you need to use a third-party tool known as Vibby.
Vibby allows you to not only share specific parts of videos from YouTube but other platforms as well like Vimeo and Twitch. With the tool, you can clip multiple sections of the video and share them with others.
- To get started, signup either with mail, Google, Twitter, Facebook, or Twitch account.
- Once signed in, go to Create vib at the top left corner and then paste the URL of the YouTube video you would like to share and then click on the Start button.
- Your video will load in the Vibby editor, now click on Highlight the parts to share.
- Here you will see the Start highlight button, jump 5-sec option, option to switch between HD and SD video quality, and volume control button. Navigate to the part you want to share and click on Start highlight.

- When you reach the end of the part, click on Finish highlight. Repeat the process to highlight multiple parts of the video. All the highlighted parts will appear in a list on the right side of the screen.
- Add a description to each part and format it, you have the option to preview before hitting the Save vib button.
- Name the vib and assign a category and then publish it to Vibby or make it a private vib.
- You get a dedicated link to your vib with the ability to embed it on your website or blog.
In this way, you can share the highlights of the YouTube video or Vimeo video easily.
Part 4: How to Get YouTube Timestamp Link on iPhone and Android?
Linking to specific YouTube Timestamp Link is straightforward on both iPhone and Android.
- Go to YouTube and select the video you want to share.
- Move through the progress bar of the video to reach the key part and click on the Share button.
- A pop-up menu appears, highlight the URL and click on the Copy button.
- Paste the URL and manually add the Timestamp using the steps mentioned in add a Timestamp manually.
Part 5: Is Timestamp Beneficial for your Video?
Timestamping your YouTube videos may decrease the watch time, but it enhances the user experience, and they want to see more of your videos. Apart from this, adding Timestamps to your videos make your videos discoverable through Google search. YouTube and Google will reward you for the videos in form of a high search engine ranking.
Bonus: How to Add YouTube Timestamp Link in YouTube Video Description
Adding a YouTube Timestamp link in your video description is easy. Here are the steps to do so.
- Go to your YouTube channel and select the video you want to add Timestamp to and then navigate to the description below it.
- Edit the description by clicking on the Edit Video button.
- You are redirected to the Video Details page. Here write 0:00 at the first part of the timecode, and then continue with the time of the key part of the video you want to add the Timestamp to in 2:40 format. You can add more Timestamp as well and then click on the Save button.

- Reload the video page and you will see auto-generated Timestamp Links at the specific time you provided in the description.
Note: You need to add at least three timestamps which are 10 seconds or longer in order to add timestamps successfully.
Conclusion
As much as possible YouTubers want to make videos short and to the point. However, if a video needs to be longer, you can still help users navigate through to find what is important to them by adding Timestamp to YouTube link or Timestamp the YouTube descriptions. This can help your viewers jump straight to the interesting part in the video, rather than viewing the entire video saving their time and boost user experience.
Richard Bennett
Richard Bennett is a writer and a lover of all things video.
Follow @Richard Bennett
- Title: [Updated] In 2024, From First to Last Your Guide to YouTube Video Looping 101
- Author: Jeffrey
- Created at : 2024-08-20 16:42:11
- Updated at : 2024-08-21 16:42:11
- Link: https://eaxpv-info.techidaily.com/updated-in-2024-from-first-to-last-your-guide-to-youtube-video-looping-101/
- License: This work is licensed under CC BY-NC-SA 4.0.